BUILD YOUR OWN AT
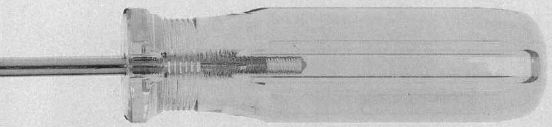
FORGET THE AMMETER AND OSCILLOSCOPE, DROP THE ELECTRICAL PROBES AND DREADED SOLDERING GUN. TODAY YOU CAN ASSEMBLE A PROFESSIONAL-QUALITY PC WITH A SCREWDRIVER.
BRUCE W. HAASE
Not more than a dozen years ago, if you wanted a personal computer there was only one way to get it—build it. That process required knowledge of electrical engineering and a high level of mechanical aptitude, and the resulting machines were meager by today's standards.
Nowadays, you can buy a PC at almost any department store. But the system of choice for the home professional is no longer the IBM PC or XT compatible (although these systems are still around and extremely reasonable in cost). The AT-class personal computer has taken the lead as the top MS-DOS platform for personal use. Although several times more powerful than an XT, the AT costs only a few hundred dollars more.
What's more, assembling a computer is no longer reserved for the technological elite. If you're sharp, you can pick up a manufactured system for about the same price as a home-built computer, but you'll never gain the experience, knowledge, and confidence about your system that a computer builder gains. Think of how your friends will react when you bring them by the house, point to your new computer, and proudly say, "I built it myself."
Taking Your First Steps
The first step toward building a computer is the same one you take when buying one: Analyze your computing needs. What are you going to do with your computer? Draw up a list of the software that you're using or are planning to use. Will you be doing word processing? Will you also be doing accounting? What about graphics, programs? Is there any graphic art or desktop publishing in your computing future?
It's a good idea to check whether your current or proposed software requires any specific hardware. Many software developers have moved toward the 80286 as their minimum hardware platform. This is especially true for graphics-intensive programs, like desktop publishing packages, and it goes double for those programs designed to run under a graphical user interface like Windows. A hard disk drive is another hardware option to consider. You can always add one later, of course, but it's more economical to have it from the start.
These are all commonsensical questions, yet it's surprising how many first-time buyers order a computer based on what their friend, their sister, or their co-worker uses. The personal in personal computer means just that; what works for someone else may not be best for you.

After you've defined your minimum needs, you can embellish your list. Think of applications that you want to explore in a year or two. Think of hardware options that, although not absolutely required, would be nice to have.
From here, you can rate your needs and wants. Before talking to any sales-person, I always categorize my list. Hardware items go into one of three columns: must have, nice to have, and luxury. That, balanced against what money I have available, forms the basis for what I buy.
This project had a cap of $1,500. My software requirements included word processing, desktop publishing, spreadsheets, and database management, and the performance I was seeking mandated an AT platform. Based on those criteria, my must-have list included an 80286 processor, a 20-megabyte hard disk, 640K of RAM, a monochrome graphics adapter and monitor, a single 1.2-megabyte 5¼-inch disk drive, one parallel and one serial port, and a 200-watt power supply.
In my nice-to-have list, I included a 40-megabyte hard disk, one megabyte of RAM, EGA graphics, an additional floppy drive (3½-inch, 1.44-megabyte), a 101-key AT-style keyboard, a mouse, and a printer. When I finished my luxury list, I had bumped the capacity of my hard disk to 80 megabytes; upgraded my graphics to VGA; added another megabyte of RAM, a tape backup system, dual parallel and serial ports, and a scanner/fax board; and went for a tower case rather than the baby AT case I had planned to use.
Buying Spree
I could have purchased any of the items on my list from a local computer dealer, but I usually buy from one of several national distributors that specialize in computer components. If you decide to go that route, browsing through almost any computer magazine will reveal two or three names.
Few dealers can beat the price of a mail-order house. National suppliers sell hundreds or thousands of separate peripherals and components each month, while local dealers sell a few dozen or less. Dealers are sometimes paying more for an item than mail-order houses are selling it for. So, while it never hurts to try your local dealers
first, you may find the best price by mail.
Another possible way to save yourself some money is to inquire about the availability of kits. A distributor's kit, containing all the items required to build your PC, may match your requirements. I've found that the price of kits are usually 10 percent or more under the price that I would pay for the same items individually.
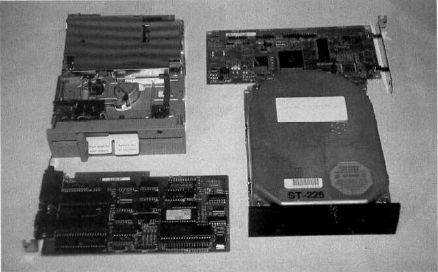
For this project, I was able to buy a kit from a national supplier that contained everything on my must-have list, excluding the hard drive, monitor, and printer. The kit cost $599.95; the hard drive (a Seagate 20-megabyte ST225 with a Western Digital AT controller card) cost $339.95; a 14-inch, high-resolution monochrome monitor cost $119.00. For the complete system, I spent under $1,060. I had $440 to put toward other options.
I could have bought a less-expensive kit, but this one included a very good 12-MH motherboard, AMI BIOS with setup, diagnostics, and hard drive utilities installed in ROM. I also got the latest version of PC-Write and a separate diagnostics program called QA-Plus. As an added bonus, my kit came with a deluxe 101-key keyboard (one of the items on my nice-to-have list.)
Mail Call
When your equipment arrives, the first thing you should do is compare the list of what you ordered against the shipping statement. Make sure everything matches; if there are any discrepancies, immediately call the representative from whom you ordered. You should also check for obvious damage to your components. If all is OK, put everything aside until you have time to build your machine from start to finish.
The time it takes to assemble a personal computer depends on your experience and the complexity of the machine. For your first effort, figure on one full day.
Getting It Together
Before you start snapping and screwing parts together, prepare your work area. Carefully remove all of the components from their individual boxes. Most items have an antistatic wrapper. Leave the wrapper on until you're ready to install that particular piece. Static electricity is sure death to a computer card. Make sure that the humidity in your assembly area is sufficient to eliminate any possible static problems. If you have a problem with static, you'll probably want to buy an antistatic work mat.

Before going any further, find all the documentation and instructions that came with each item, and read everything before starting. (With my kit, I received instructions on the case, the motherboard, each peripheral card, the drives, the monitor, and general assembly.) If you follow the instructions step by step, things will go smoothly; if you don't, you'll be in for a lot of grief.
If you didn't order a complete kit, you may not get step-by-step assembly instructions. In this case, it's even more important that you read and understand the documentation before you begin. Either way, with a kit or with separate components, make sure to puzzle out the exact steps and procedures you're going to use.
Oh, Mother
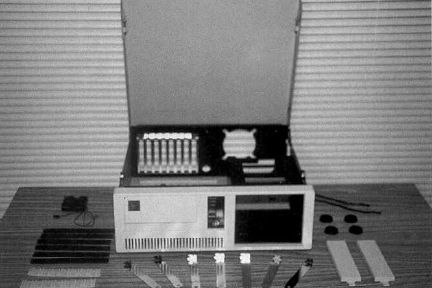
Begin by preparing the case. Again, be sure you follow the instructions to the letter. If the instructions say to remove the cover or to install the speaker first or to remove the drive-bay cage before you do anything else, then do it.
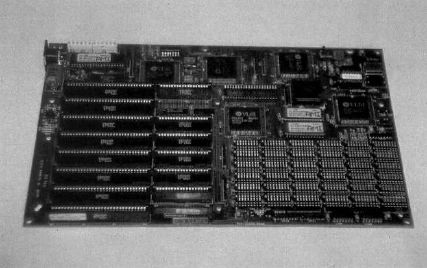
After you've readied the case, you need to do some preliminary work on the motherboard. Check to make sure that the holes in the motherboard line up with the standoffs that you've installed in preparing the case. (Standoffs support the motherboard and prevent damage.) Carefully lower the motherboard into position; it must line up with the case's back plate and fasten to the standoff's securely. If you've ordered both the case and motherboard from the same place, you shouldn't have a problem. But if there is a mismatch, you'll have to make provisions to ensure that the motherboard is seated securely into the case.
Before you engineer a solution to the mismatch problem, be sure you examine the situation carefully. If the modifications can't be made easily, either the case or the board will need replacing. Phone your suppliers before you go any further. Neither vendor is going to be happy if you return the equipment after an unsuccessful modification.
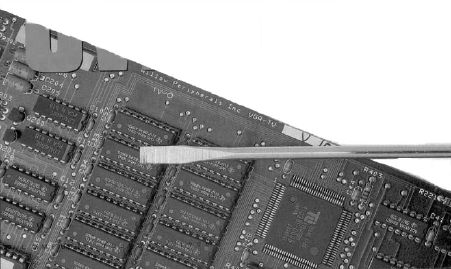
Assuming that the motherboard fits, take it back out of the case. The motherboard runs under a wide variety of parameters. It must know about your computer's memory (both speed and amount), the monitor, the drives, the math coprocessor if there is one, and any other options specific to your system. By setting the DIP (Dual Inline Package) switches and pin jumpers, you can tailor the motherboard to your particular configuration. If you change a DIP switch, never use a pencil point.

The graphite in pencils is death to computer circuitry.
Take this time to familiarize your self with the pin connectors located on the motherboard. These pin connectors are what the speaker, turbo light and switch, keyboard lock, and reset button plug into, so you'll want to know their whereabouts. By the time you get around to making these connections, your view of the motherboard may be obstructed by other components.
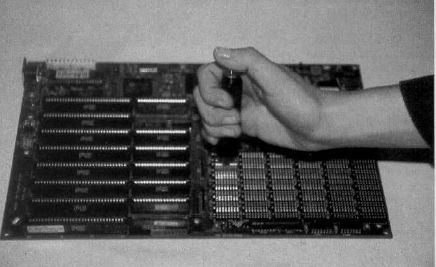
Now you're ready to populate the motherboard with RAM. (Always do this before you permanently install the motherboard in the case. Otherwise, you'll put too much pressure on the motherboard.) Use caution when handling and inserting chips, because DRAM chips are very susceptible to static discharge. Make sure that you ground yourself and that static electricity levels are acceptable.
You can install chips by hand or with an insertion tool. I recommend a chip insertion tool, which will cost you under ten dollars. Computer chips have legs (pins) that slant outward from their base. This design stops chips from working their way out of their sockets, which is apt to happen from heat expansion. An insertion tool gently squeezes the legs of a chip into a parallel row, allowing easier insertion into the socket. A chip's legs are fragile; it's easier to bend or break a leg by hand than by using an insertion tool.
Regardless of your insertion method, it's easy to put a chip in backward. Usually, there's a notch on the socket and a matching notch on the chip to help ensure correct chip orientation. Once you've installed them, check the chips and look for any that are facing the wrong way or that are not completely seated in a socket.
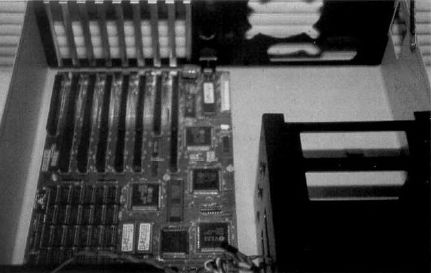
Finally, you're ready to install the motherboard. Position it over the standoffs, and make sure that the bus-extension slots on the board face the rear of the case, Adjust the board to allow sufficient clearance between the rear edge and the case. Extension cards have a tongue on their back plate that slides between the computer case and the motherboard. If you don't allow enough clearance between the case and the edge of the motherboard, you'll discover later on that you have to undo everything to adjust the board.
More Power to You
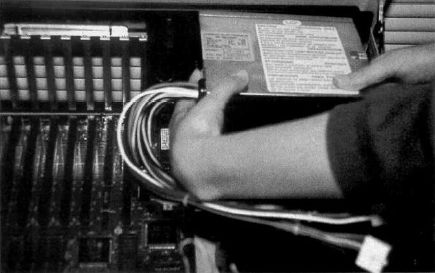
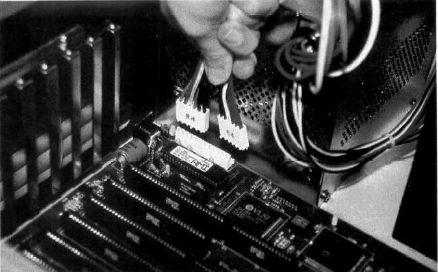
Your next step is installing the power supply. Most power supplies slide into position and fasten to the rear of your case. They have two, six-wire cables that attach in tandem to the motherboard. Make sure that you connect these correctly; if they're wrong, your motherboard will fry the first time you turn on your PC.
After you've place the power supply, but before you install any extension cards, locate the motherboard's pin connectors you found earlier and attach the wires form the case. Also, if your PC has a separate battery source to maintain, the board's clock/calendar function, attach the battery leads and fasten the holder to the case.
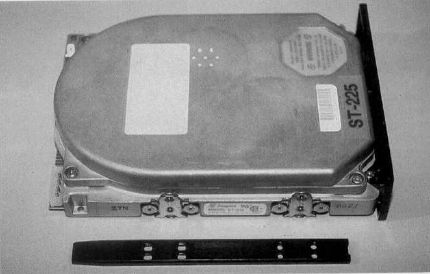
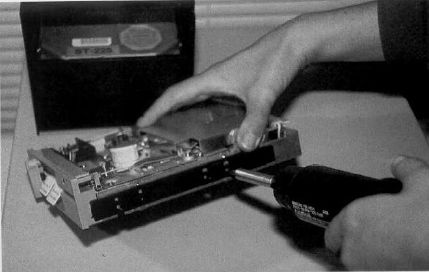
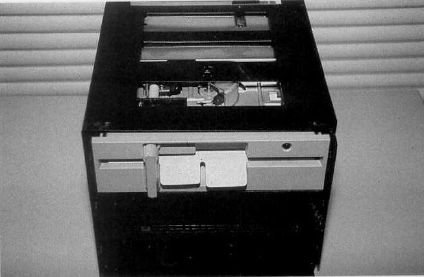
Now you can install the drives. Most ATs use plastic rails that are attached to the side of the drives. The drives slide on these rails into the drive cage. Some computer cases may require that you first remove the drive-bay cage, install the drives into the cage, and then remount the entire assembly. Once you've installed the drives, connect the power cables from the power supply. Make sure that you attach a separate grounding cable to each drive.
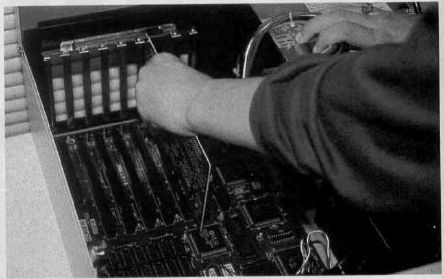
Your expansion cards come next. Before installing them, review the documentation on each card. You'll probably need to set each card's DIP switches and jumpers before you install it. With cards that have cables, such as the floppy and hard drive controller, you may find it easier to attach the cables before you install the card. Seat each card by firmly pressing it into its expansion slot; then fasten the card's back plate to the case.
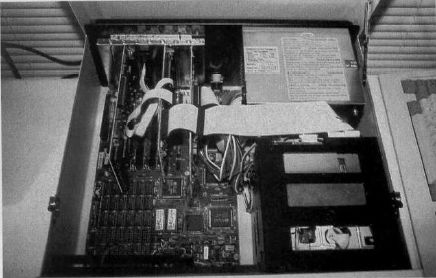
Finally, connect the cables from the controller card to the drives, and then connect any remaining cables, install the clock/calendar batteries (if required), and check over your work. That's it. You're temporarily finished with the inside and are ready to power up your creation.
The Case Is Closed
Close the computer's case (or slide the case's cover back on), plug in the power-supply cord, the monitor, and the keyboard; then insert your DOS disk into Drive A. Because ATs store their setup information in the CMOS (Complimentary Metallic-Oxide Conductor), when the computer boots up for the first time, that information won't be correct. Some motherboards come with a setup program burned into ROM; others require a setup disk. In either case, after you supply the right information regarding drives, memory, monitor, and other peripherals to CMOS, you'll have to reboot your PC.
On the second boot, you'll want to do a low-level format on your hard drive before you go any further. When you've finished with that, reboot again; you should see the familiar time-and-date prompt.
Congratulations—you're done with the basic assembly. If you've encountered problems, now you can start debugging them. If you system fails to boot, remove or open the cover and check all of the cables. If your PC failed to recognize the A drive, make sure that you have installed the correct cable connector to the drive. If the system fails to recognize the hard drive, remember that you must perform a regular format after performing a low-level format. Most kits include a trouble-shooting guide. If you have one, compare the message that you receive during boot-up with the error messages in the manual and follow any corrective steps recommended.
If, after these steps, you're still stymied, call the supplier. A quick call to technical service can probably help you clear up your problem.
There are just two more steps to follow in completing your project. Every component you've installed in your computer has a specific and unique address and interrupt. You can get this information from the documentation. Write down the final addresses and interrupts used on a piece of masking tape, and stick this list to your power supply. Later, when you install another device or card, you'll have a list of what interrupts and addresses are already in use. Finally, if you weren't tidy when you attached the drive cables and the inside of your box resembles a bowl of spaghetti, take a few minutes to reposition the cables.
Bonus Round
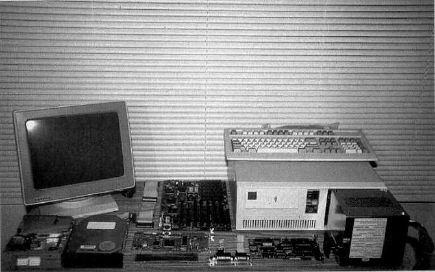
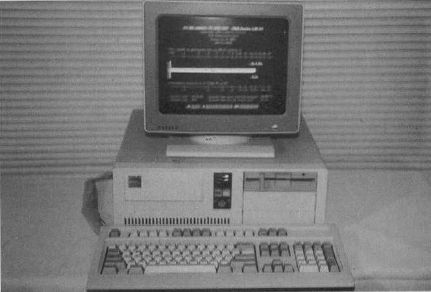
You're now the proud owner of a super home-brewed personal computer.
You've built an AT-class machine that rivals many commercially available models. The computer that I put together for this article has a Landmark Speed rating of 15.6 and a Norton SI rating of 13.4. The hard disk rating was 1.9 with total performance coming in at 9.5—not too shabby.
|
A WORD TO THE WISE You don't need a degree in electrical engineering to build a computer, but it pays to be familiar with the language. This glossary explains some of the terms that you're likely to encounter during your construction project. address. The tag (or name) of a particular storage location. Addresses are used by a computer in the same fashion that people use street addresses to find businesses or houses. AT. A personal computer based on an Intel 80286 CPU. This computer architecture was released by IBM in 1986 as the IBM PC AT. The AT has a 16-bit CPU and a 16-bit data path. BIOS (Basic Input/Output System), ROM chip(s) containing the instruction set for data flow and interfacing all devices such as keyboard, and drives, and monitor. bus. The channel or path designed for flow of the computer's information stream. bus slots. (Also called extension-card slots.) Provided for extension cards that need to be plugged into the computer's bus. Bus slots are located on the motherboard. CMOS (Complimentary Metallic-Oxide Semiconductor). Used on AT computers to store system information needed during boot-up—for example, the type and quantity of drives, the amount of RAM, and the current time and date. CPU (Central Processing Unit). The heart and soul of a computer. The CPU contains an arithmetic logic and a control unit. DIP switch (Dual Inline Package switch). Used to change the computer's bus or an extension card's logic or data flow. DIPS are set to on or off. extension card. (Also called device driver card, controller card, peripheral card, or interface card.) Separate circuit cards that are used to link peripheral devices with circuits or devices on the motherboard. interrupt. A signal or message given to the computer that a device or address location needs attention. The computer stops (interrupts) whatever program it is running, responds to the signal, and then returns to its previous program or functions. jumper. A small connector used to join two circuit pins. Depending on the setting, (on, off, open, or closed), the computer bus or an extension card's circuitry and logic are changed. motherboard. (Also called a systems board or a planer board.) The main circuit board. All circuitry is either on or attached to this board. OEM (Original Equipment Manufacturer). The actual manufacturer of a computer, as opposed to the company that sells it. RAM (Random Access Memory). That part of a computer's memory where information is stored and obtained through specific addresses. ROM (Read Only Memory). Computer memory whose content isn't alterable by instructions. standoff. A smell metal or plastic riser used to keep the motherboard from touching me computer case. |

I still had over $400 left out of my $1,500, so I looked around for ways to augment my new computer system. I dropped $165 on a Star Micronics NX 1000 printer; another $89 went toward a mouse (which was bundled with a paint program); I added a 3½-inch, 1.44-megabyte floppy drive for another $120; and, for about $28, I asked my supplier to substitute a tower case for the case that came with the kit. The total cost then came to $1,460. That left just enough for paper, a printer stand, and a printer cable.
I would have liked more memory. Memory chips have fallen dramatically in price during the last year. You can buy a megabyte of RAM for under $140. But, figuring that memory prices will continue to fall, I decided that if future applications required more memory, I could always add it.
Know It All
By building your own computer, you gain the knowledge and skill required to modify or upgrade your computer as your needs change. Installing a VGA card, a modem, or another floppy disk drive won't throw you into a panic. You'll also discover that you've gained a better understanding of the fundamentals required to diagnose any problems that may crop up. If your hard drive fails, for example, you'll know how to check both the disk and the controller. If a video card flakes, no problem. You say you have a parity error? Just check the RAM chips, find the culprit, and replace it.
Almost anyone can build a computer these days, given the inclination and the patience to carry the job through. If you can analyze your needs, translate that analysis into a priority list, read and follow instructions, and identify the business end of a screwdriver, then you should be all right. You may not save a lot of money, but the experience is worth the effort. Good luck, and good building!
|
This article is a generic guide to assembling a personal computer. The author makes no claims as to the article's validity or accuracy regarding any specific computer assembly kit or computer configuration. |
Bruce W. Haase is a writer and computer consultant in Muskegon, Michigan, where he teaches a local seminar in personal computer building.