BLISTERS
AND FRUSTRATION
Joysticks, Paddles, Buttons and
Game Port Extenders for Apple, Atari and VIC.
By David H. Ahl
Do you find yourself putting off a game of Super Invaders or Sneakers because of the too-small button on the Apple Paddle controller? Did you buy ABM or Red Alert, only to find them too frustrating to play without a Joystick? Do you find Snack Attack or Jaw Breaker impossible to play from the keyboard?
Increasingly, with the sophisticated game designs appearing on the market and with more and more designers copying the popular arcade games, it is next to impossible to enjoy these games without a good set of paddles and joystick controls.
In this review, we examine many of the popular paddle and joystick controls now available for the Apple, Atari and VIC computers. We also look at some ancillary accessories which make these controls easier to use.
Paddle Controls
The word paddle is a misnomer. The rotary control called a paddle is actually a variable resistor, which is also (correctly) known as a potentiometer or rheostat. In a sense, the control is the same as a volume control in a radio except that the resistance varies in a linear fashion from the beginning to the end of rotation in a computer control whereas it follows an "S" curve in most audio devices.
The reason this control is called a "paddle" in the personal computer industry is that it originally got its name from the control which moved the paddies on the screen in the game of Pong. This was followed by the game of Breakout and by then the incorrect term, paddle, had taken hold,
In a book that I am working on, an editor changed the word paddle to "knob." This, of course, is equally incorrect. However, since it is unlikely that the computer world is going to grow to love the correct term potentiometer or rheostat, we are stuck with paddle.
Incidentally, it is up to the computer program to translate the resistance value the paddle into something that can can be used in the program. In the Apple, normally one end of the resistance is assigned the value of 0 and the other end 255. However, game designers can achieve much tighter control, i.e., less paddle rotation, by using the value of say 60 as one edge on the screen and 180 as the other.
Good software must also take into account one other factor: paddle and joystick adjustment. Since there seems to be little standardization among manufacturers as to the value of the potentiometer to be used in paddles and joysticks, good software should allow the user to set the joystick or paddle to one extreme and then the other and adjust the program accordingly. Of course, another acceptable approach is to use just a portion of the rotation. The resistance of the potentiometers in the paddles and joysticks we have measured has varied from a low 70K ohms to a high of 185K ohms. The nominal value "expected" by the Apple computer, incidentally, is 150K.
Controls with higher resistance require less rotation from one side of the screen to the other, thus the control responds more quickly. On the other hand, high-resistance controls are less precise for making fine adjustments needed to hit small targets such as the bonus pine trees in County Fair.
Joystick Controls
Joysticks come in two varieties. First is the type found in most coin-op arcade games, the Atari Video Computer System and the like. It has four switches corresponding to the four directions that the joystick may be pushed. Hence, when the joystick is in the center position, all switches are off. If it is pushed squarely to the north, east, south or west, one switch will go on for each direction. An intermediate (diagonal) direction will normally cause two of the switches to close.
In the joysticks used in arcade games, the diagonal directions are sometimes "locked out" by means of nylon adapter plates which permit movement in only four (sometimes only two) directions.
A second type of joystick is one which uses two potentiometers, one for the north/south or Y direction and the other for the east/west or X direction. This type of joystick often does not have automatic centering as the four-switch joysticks usually do. Centering on the ones that have it is usually accomplished by means of small springs which may be removed if the user desires.
In general, a potentiometer-type joystick may be used for all joystick applications whereas a switch-type is useful only for games requiring on-off movement control in two, four or eight directions. However, it is generally easier to use a switch-type Joystick for the PacMan and Berzerk families of games as it provides more positive control and better centering.
User Features
The motoring magazines sometimes say of a car, "the controls fell naturally to hand." We found that some of these controls felt better in the hand than others. Indeed, some were clearly designed for table top use and did not fall at all naturally to hand. Furthermore, hand sizes are different, so what may be a good hand-held control for an adult male may be overly large for women and children.
Tactile feedback is the positive indication to the user that contact has been made in a control. Two schools of thought exist about tactile feedback both among users and manufacturers. One holds that it is necessary and good. The other holds that it is unnecessary and not cost-justified. I know, people who want a positive click when a firing button is pressed whereas I press buttons forcefully enough that I don't need or want any additional feedback to tell me that I've made contact. Since it is a matter of personal preference, we have simply noted in this chart whether a control has tactile feedback or not.
Game Control Extenders
Ordinary DIP (dual in-line package) sockets are not designed to be used over and over; eventually they won't make contact. Also, repeatedly stressing a 16-pin connector will cause the pins to bend and possibly snap off. Furthermore, continually messing around with the game I/O connector on the back of the Apple motherboard is just not healthy for the motherboard itself.
Hence, if you expect to change back and forth between joysticks and paddles very much, we strongly recommend a game control extender. One type consists of a quick disconnect zero insertion pressure I/O port mounted on the outside of the computer. The device is permanently plugged into the Apple game port inside. Examples of such devices are the EZ Port from Versa Computing or game socket extender from Happ Electronics. Utilizing a ZIP (zero insertion pressure) socket, the user merely plugs in his 16-pin DIP plug and throws a small switch which engages the connection within the socket.
An alternative to a single port extender is a switchable port unit. While more expensive than single extensions, these units allow paddles, joystick, lightpen, VersaWriter or other control devices to remain plugged into the Apple permanently.
We've Found it useful to paint the notched end of the DIP connector of various plug-in devices with a small dab of white paint or liquid paper. This marked end corresponds to Pins 1 and 16 which are the up direction on most extension port devices when they are mounted on the right side of the Apple case.
Protect the Connector
We also keep small pieces of styrene around to plug the DIP connectors into when the device is not in use. All too often pins have been broken or bent when a socket was accidentally stepped on or banged by a chair. The white styrene (a packing peanut will do quite nicely) not only protects the plug but is also quite visible if it falls on the floor.
Atari Joysticks use an Atari-type DB-9 plug (which is considerably more rugged than a DIP connector. Nevertheless, repeated insertion and removal tend to distort the female receptacles on the joystick cables.
To overcome the connector vulnerability problem, CJM has gone to rugged but more expensive Cinch Jones connectors (see description below).
Test Procedure
Each paddle and joystick was given a thorough workout by all members of our game testing panel. As we've mentioned before, our panel consists of adults and children of both sexes over a wide age range. Thus, products are judged from many different perspectives.
Paddles were tested using the following games: Torax, Tsunami, Sneakers and County Fair.
Potentiometer-type joysticks were tested using Photar, ABM, Pegasus II, Red Alert and Twerps.
Switch-type joysticks were tested with Thief, Snack Attack and Labyrinth on the Apple, Preppie and Star Raiders on the Atari Personal Computer, and Dodge'Em, Pitfall and Cosmic Swarm on the Atari VCS.
Recommendations -- Apple
For maximum game playing enjoyment, we recommend the following for the Apple computer.
1) A set of paddles. Paddles differed mainly in firing button placement, size, shape, and throw. You should look for one that suits your style of play. In general, left-handed players will find fewer suitable paddles than right-handed players.
2) A potentiometer-type joystick. As with paddles, the main differences among joysticks were in the firing buttons, although, as the individual descriptions indicate, there are other differences as well. We recommend a joystick which is not self-centering or one in which the self-centering can be defeated--preferably outside the case. While trim adjustments are desirable, most joysticks did not have this feature, and those that did were not necessarily the best in other regards. If you do not have or plan to get a switch-type joystick (see number 3), then you should probably get a potentiometer-type joystick with self-centering.
3) Switch-type joystick. The value of this type of joystick for playing PacMan, Berzerk and maze games cannot be overstated. It is far superior to a potentiometer-type joystick and you will be astonished at the added enjoyment of playing games using this type of joystick. To use a switch-type joystick with the Apple computer, you will need an adapter of which there are only two on the market-from Astar and Sirius. Naturally, you must have this type of joystick for the Atari Personal Computer and Video Computer System.
4) Game port extender. It is a matter of personal preference whether to get a single game port extender with a zero insertion pressure socket or a more elaborate unit with up to six sockets for external devices. While all the extension devices tested had one or more desirable features, no one device had absolutely everything. Our ideal device would be one with four switch selectable, zero insertion pressure DIP sockets, two non-diode isolated sockets, and two switch selectable DB-9 sockets. The device would also have a jumper panel so that one or two of the DIP sockets could be wired to your own specifications.
5) An external speaker or hi-fi adapter (see reviews for explanation).
By selecting the cheapest device in each category, a set of these five devices could be put together for as little as $100. However, a more realistic budget would be $180-200. That may sound like a lot, however, the increased enjoyment from playing games with quality controllers and good sound cannot be overemphasized.
Recommendations -- Atari and VIC
For an Atari computer or VCS (or Commodore VIC 20) our recommended list is a bit shorter than for the Apple.
1) Switch-Type Joystick. Of course you have the joysticks that came with your system, but we think an arcade style stick will substantially enhance your game play.
2) Console-Type Controller. For games such as Asteroids or other adaptations of arcade games with button controls, you might want a controller that plays the same as the original. Several models are available with different key arrangements, rapid fire buttons, etc.
3) Game Port Switch. Several companies have announced devices which select any one of two or three devices plugged in and route the signal from that one to the Atari. None were available for us to test, but they seem like a good idea.
One of each of the above will set you back about $80. We think it is well worth it for the added enjoyment of game play.
Have Fun!
POTENTIOMETER-TYPE JOYSTICKS FOR APPLE
A2D Joystick (2001)
In contrast to other joysticks, the A2D Model 2001 features an open gimbal design usually found only in precision radio controlled model airplane controls. According to the brochure, "this design results in a lighter feel and more precise movement than that available with ball stick assemblies." We found this to be true and, in fact, found that this design allowed us to play games for which we normally recommended a switch-type joystick (Pac-Man, Berzerk, etc.).
The compact size-of the Model 2001 permits it to be easily held in one's hand, and the placement of the two buttons on the back allows them to be pressed with the index and middle finger of the hand holding the joystick. Unlike some others (and the earlier A2D Model 1002), the Model 2001 does not favor either left or right handed players. We especially liked the buttons on this joystick. They are large (5/8" square), have a very short throw, and provide excellent tactile and aural feedback.
|
Mechanical trim is provided for each axis, allowing accurate self-centering of the stick.
The control knob on the joystick is relatively small and is held by friction to the end of a non-threaded shaft. People had mixed feelings about this. Some liked the small size because of the precision "feel" it seemed to impart. Others, however, found the knob occasionally came off in their fingers during particularly violent play of a game. Once aware of this, most players were able to adjust their playing style to compensate.
The Model 2001 comes with an extremely generous 8 1/2' shielded cable. As it is round and not a ribbon connector, it is quite flexible.
In summary, the A2D Model 2001 is an outstanding joystick in practically every respect and it got high marks from all members of our playing panel. Our only minor criticism is the friction-fit knob, but most people will not find this a major drawback.
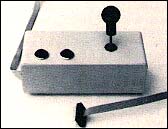
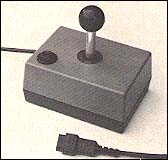
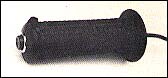
Kraft Joystick
The Kraft Joystick is mounted in the same large 4" x 4" x 2 1/4" housing as the Kraft Paddles. It is slanted forward by about 10 degrees and has two firing buttons in the upper left corner, one on the top and one on the back. Their positioning makes it convenient to fire with the thumb and the index finger or index finger and middle finger of the left hand. Like many of the other joysticks tested, the Kraft Joystick favors the right-handed player.

|
The joystick knob itself is 3/8" in diameter. There seem to be two schools of thought about knob size. One holds that knobs ought to be relatively large, similar to those found on coin-op arcade games, while the other holds that the joystick is a precision instrument and the knob ought to be small, like those found on model airplane RC controls.
Our game playing panel members had no strong preferences as to knob size. We did prefer that the knob not come off in one's hand during violent game play. Fortunately, the Kraft knob is well designed in this regard. It is permanently fixed to the staff and, although the staff itself unscrews from the controller ball, it did not unscrew during game play nor did it develop any annoying looseness as did several other joysticks.
Two levers on the housing (located below and to the left of the control stick) allow fine adjustments to the electrical center of the joystick. Each lever controls a separate axis (X or Y). As we mentioned before, we found this a most desirable feature, not only for game playing adjustments, but especially when using a joystick as a graphics input device.
We have also been heard to say how nice it would be to find a joystick on which self-centering could be turned on or off at will. Lo' and behold, the Kraft Joystick has such a feature.
To disengage the spring centering mode, the joystick is simply turned upside down and two little mechanical switches are moved to the "free" position. To reengage the automatic spring centering, the switches are moved away from the free position--that is all there is to it!
Incidentally, the first joystick we got from Kraft had one of these two switches installed upside down, so we could move only the X axis to the free position. After taking the joystick apart completely, we determined that these switches were permanently glued in place and could not be fixed by the user. We notified the factory and got a new joystick promptly.
We were assured by several people at Kraft that this had never happened before, nevertheless, it might not be a bad idea to look over the joystick at your dealer and make sure it is completely functional before taking it home.
The Kraft Joystick has a generous 5' cord which is more flexible than most. Like the paddles, it has a curious little 6" wire with an alligator clip on one end attached to the DIP plug. This clip should be connected to a chassis bolt to ground the cable shield, a fact which is not mentioned in the instructions.
All in all, our game playing panelists were very enthusiastic about the Kraft Joystick. Although the pushbuttons provide no tactile or aural feedback, this lack is more than compensated for by the excellent features of the joystick: a tight knob, external trim adjustments and selectable operating mode (self-centering or free). The joystick is best suited for operation on a table top or in one's lap; there is no convenient way to hold it comfortably in one hand and operate the pushbuttons as well as the stick. Bottom line: highly recommended.
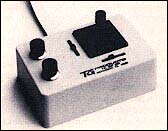
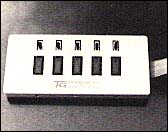
TG Super Joystick
The housing of the TG Super Joystick was the largest one tested. Its larger size coupled with the placement of the firing buttons on the left top of the case make it most suitable for table top operation. Some right handed players found it could be held in the left hand for games using only one firing button.
|
The firing buttons are large (0.6 in dia.) and flat; thus they are easy on the fingers. They do not provide any tactile feedback and must be pressed all the way down to make contact.
The joystick itself is self-centering, a handy feature for playing Twerps, Borg and other games in which it is necessary to remain stationary on the screen. Self-centering may be defeated by removing the bottom of the case (four screws) and, with a needle nose pliers, removing four small springs from the joystick mechanism. This is a mixed blessing. While it is handy to be able to defeat self-centering, it is not something you want to do frequently. After two back-and-forth changes, we decided to leave self-centering in effect permanently.
On the other hand, the trim adjustment controls are on the top of the case and are easy to adjust when necessary.
The joystick knob is on the small side and is held by friction to a non-threaded shaft. As a result, it occasionally came off during exuberant game play. However, as with the A2D stick, most players were able to adjust their playing style to compensate.
In summary, for a right-handed player the TG Super Joystick is a good quality product with some minor drawbacks that did not substantially detract from its overall performance.
Joystick II
Joystick II is a compact (3 1/2" sq.) joystick for either table top or hand-held use. Because of the firing button placement at the left top of the unit, it tends to favor right handed players.
|
The joystick handle is small in diameter (3/8"), but its length makes it comfortable to use.
The firing button for direction 0 is 1/2" square and provides both tactile and aural feedback. Unfortunately, the switch for direction 1 is just that, a switch. To the left, it is on (like a light switch) while to the right it provides momentary contact with spring return. We found this arrangement was not suitable for playing games such as ABM and Pegasus II which require the use of both firing buttons.
The first unit we received provided variable resistance in direction 0 of 30K to 130K ohms (values of 50 to 255 to the Apple) and thus could not get to the right boundary in most games. We removed two rubber feet, opened the case, and were able to adjust the shaft position on one pot to correct the problem. Another unit tested in a local computer store did not have this problem.
Installation of Joystick II is the best we have seen. A rubber strain relief 6" from the DIP plug end of the cable fits in the notch at the back of the Apple. A U-shaped ground clip connected to the cable shield fits over the notch thus minimizing RF interference.
The instruction booklet is excellent and provides a test program. Were it not for the strange switch instead of a more desirable firing button, we would have given Joystick II our highest rating.
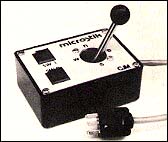
CJM Microstik
Of all the joysticks tested, the CJM Microstik had by far the easiest movement. In other words, the resistance to moving it in a given direction was virtually nil. Also, because of its larger ball (nearly 3/4" in diameter) and longer handle, it left all of the users with the impression that it was extremely easy to move and adjust. Indeed, it was one of the few joysticks that could be substituted for a paddle in games which required precise adjustment (County Fair, Tsunami, etc.). It was also suitable for use with games for which we normally recommend a switch-type joystick such as Thief and Snack Attack.
|
On the other hand, because the joystick moved so freely, several panelists complained that they felt themselves gripping it with a high degree of tension to keep it in the proper position, especially with games such as Torax and Photar. Nevertheless, the tension, in some cases contributes to accurate adjustment and some panelists found themselves getting excellent scores in these games. Others just found themselves unduly tense.
The pair of 1/2" square firing buttons on the left top of the joystick assembly strongly favored right handed players, i.e., those who wanted to control the joystick with their right hand and fire with their left. On games which required both firing buttons to be pressed, the joystick was most suited for tabletop use, whereas on games with only one firing button required, handheld control was possible with the left thumb controlling the firing button. The buttons are very short throw and provide aural, but not tactile feedback.
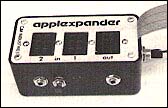
The cable is fairly short (3' 4") and terminates in a six-pin Jones plug which must be used in conjunction with a CJM Applexpander. Since this is designed to be mounted on the right outside of the Apple computer housing, the short cable length is not a disadvantage.
In summary, the CJM Microstik is of excellent quality throughout. Its exceptionally easy movement coupled with the long throw may well make this the joystick of choice for you.
Datamost Joystick
A metal case coupled with a 3/4" diameter joystick ball contribute to the solid feel of the Datamost Joystick. Two pushbuttons are mounted on the top left of the case toward the rear; unfortunately, they are somewhat small--just over 1/4" in diameter.
|
While the small size of the housing lends itself to holding in one's hand, we found that only one button could conveniently be pushed at one time. Thus, handheld use of this control was not suitable for games such as Pegasus and ABM which require both buttons to be used. For games such as this it was necessary to put the case down on a flat surface and control the buttons with the opposite hand (usually left) from the one controlling the joystick movement. One of our panel members who preferred left-hand control of the joystick and right-handed button pushing found this control rather awkward because of the left side position of the buttons.
Although button movement was very short (about 1/10"), a desirable feature, some of our panelists felt that more pressure was required to press the buttons than with other joysticks. Indeed, several of our panelists complained of finger fatigue after using this unit.
The Datamost Joystick handle has extremely short play; as a result it has fast action but is difficult to adjust precisely. It is not self-centering nor does it have potentiometer adjustments. There are no instructions included with the unit.
In summary, for a right-handed player, the Datamost Joystick offers a solid feel, quick action, 3/4" diameter ball and short button movement. Button pressure seemed high and button placement was awkward for lefties.
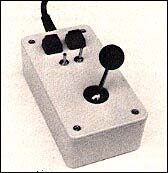
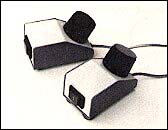
Astar Robo Stick-1
The Robo Stick-1 is a high-quality joystick imported from Japan by Astar International. Indeed, we found it good enough to use in place of paddles for games such as Torax and County Fair which require rather precise paddle movement.
The resistance of Robo Stick is very low (75K ohms) which contributes to the feeling of precise movement. On the other hand in some games which look for the full 150K ohm resistance, Robo Stick was unable to reach the edge of the screen--a rather serious disadvantage.
The hand control is a nice chrome ball approximately 3/4" in diameter. Two 3/8" diameter pushbuttons are located on each side of the rear part of the black plastic case.
|
The firing buttons on Robo Stick are concave, i.e. , the rim of the button is higher than the center. In games requiring much firing, this can be very hard on one's fingers.
We found it most comfortable to hold the case in either the right or left hand using the thumb and middle finger to control the two buttons while the other hand attends to the control of the Joystick. People with small hands may find handheld use difficult.
We found that people had relatively strong preferences as to the placement of firing buttons and joystick controls. Those who liked Robo Stick-1 did not particularly like the TG joystick and others like it. These joysticks have both buttons to the left side on the top of the control. In general this arrangement is more suitable for leaving on a flat surface while Robo Stick is more suitable for holding in one's hands.
Robo Stick-1 is not self-centering nor does it have potentiometer adjustments. We are told by the manufacturer that Robo Stick-2 will have a feature which will permit it to be either self-centering or not as the user desires.
The instructions for the Robo Stick-1 include a game program to check all of the functions. It's not a wonderful game, but it is a way of testing the joystick if you don't have any other programs which use a joystick.
In summary, were it not for the concave firing buttons and low resistance potentiometers, we would have rated Robo Stick outstanding. Because of the precision feel and good arrangement of firing buttons, we still think it is a good choice for playing most joystick games, particularly at the bargain price of $29.95.
Video Stik
Three years ago the Video Brain computer was announced with much fanfare. It was a well-engineered unit designed to compete with the Bally Arcade, Interact Personal Computer, and others of its ilk. Unfortunately, Video Brain made a bet on the APL language, their version being APLS. Unfortunately, this was not a wise choice and Video Brain went out of business within a year.
However, they manufactured a great number of joysticks and other accessories and kept the company afloat a while longer selling these accessories. Today, Video Brain is long gone, but their joystick lives on in the form of the Video Stik now marketed by Zircon.
|
The joystick itself has a longer stick and a longer throw than most other units on the market. This, coupled with its low 90K ohm resistance, allows more precise control than most other joysticks. On the other hand, like the Robo Stick, with certain games it cannot reach one extremity of the screen.
Video Stik is designed for handheld use and favors the left-handed player because of the placement of the two firing buttons on the left side of the unit. In other words, when it is held in one's right hand, the two firing buttons may be easily controlled with the index and middle finger while the joystick may be moved with the left hand.
If used with an adapter such as Paddle-Adapple or software which allows interchanging the two axes, it is possible to reverse the normal axes thus permitting the joystick to be used upside down. Then it can be held in the right hand with the buttons controlled by the middle and ring finger of the left and joystick movement controlled by the right hand. Unfortunately, this reversal of axes is not always possible, hence Video Stick is probably best suited for left-handed operation.
The handle occasionally came unscrewed, a minor annoyance. The firing buttons on Video Stick are slightly concave (outer rim higher than the center) and thus were somewhat fatiguing in games requiring a great amount of firing. Video Stik comes with a 6' cable, two feet longer than most others. Although it has drawbacks, the long throw of the joystick coupled with the good handheld feel might make Video Stik the joystick of choice for you.
BMP Joystick
The first thing that strikes one about the BMP joystick is the orientation of the stick and firing buttons. Rather than the common horizontal orientation with the two firing buttons on the left side, the playing orientation of the BMP stick is vertical and the two firing buttons are found toward the top end of the case. Thus the joystick is equally suitable for right- and left-handed players. As with other joysticks, it must be used in a tabletop position (or balanced on your leg) for games requiring pressing of both buttons. However, for single button games, since the BMP stick falls in the midpoint of the size range, it is suitable for either tabletop or hand held operation.
|
Also on top of the case are two small toggle switches, one oriented in a vertical direction and the other horizontal. These are used to reverse the direction of movement of the cursor on the screen relative to the movement of the joystick. While in most games they are unnecessary, it is a joy to have them available for games such as Star Wars. Some players like to play the game the way it was intended, i.e., the joystick moves the gun turret of the ship in which they are supposed to be sitting. Other players prefer that the joystick move the targets into their line of sight while leaving the ship stationary. There are other times when these switches are extremely handy, say in playing a game with paddle movement such as Apple Brickout which, for some perverse reason, works in the opposite direction than one might expect.
The BMP joystick itself has a rather long, stiff throw. Indeed, it was the stiffest of any of the 11 Apple joysticks that we tested. It does not have self-centering; however, because of the long throw it seems relatively easy to bring back to the center position between moves in games for which this is required.
The cable is 5 1/2' long and has a strain relief at the joystick end, although no strain relief or grounding clip is provided at the Apple end.
In summary, the BMP joystick has a good solid feel and provides precision control in games requiring continuous movement. It is less suitable for the PacMan and Berzerk family of games in which a self-centering joystick excels. The reversing toggle switches are a distinct advantage as is the placement of the firing buttons.
SWITCH-TYPE JOYSTICKS FOR ATARI AND VIC
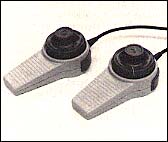
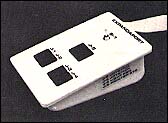
Spectravision Quick Shot Joystick
The Quick Shot features a contour handgrip with a firing button in the top of the handle. A second firing button which duplicates the action of the one in the handle is mounted in the usual place on the top, left rear corner of the base. Although the base is just 1/2" wider than the original equipment Atari joystick, because of the large handgrip Quick Shot gives the impression of being a much larger joystick.
|
The action of the stick is similar to the original Atari joystick, no doubt because the internal mechanism is virtually identical. However, the method of play with Quick Shot is quite different because of the handgrip. This takes some getting used to, but once players adjusted to this mode of operation, they found they liked the joystick very much, especially for games such as Star Raiders and Missile Command. For games such as Preppie and Pac-Man, some players preferred to use it like a normal joystick, i.e., gripping it at the top and using the fire button on the base.
As it comes out of the box, Quick Shot has four rubber feet. However, Spectravision also includes four non-skid, suction cup feet which can replace the four rubber pads. If you have a smooth table or other surface available, this is by far the best way to use the joystick as it permits true one-handed operation.
Quick Shot has a four-foot cord terminating in the usual DB-9 plug for use with Atari and Commodore systems.
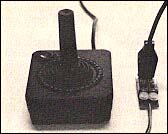
Atari Joystick
Probably the best known joystick in the industry, the Atari Joystick has two main virtues: it is cheap and reasonably reliable. Buoyed by the sales of millions of video computer game systems, an Atari Joystick is now found in one out of five homes in America.
|
The mechanism is simple. Pushing the joystick tilts the 1 1/2" diameter nylon base of the stick against a dimpled piece of light metal on a printed circuit board. When the stick is released, the dimpled metal pops back to its original (off) position. The firing button operates the same way. Thus, all of the contact surfaces are protected under a thin layer of mylar on a printed circuit board. On old Atari joysticks, these switch contacts were exposed, thus leading to much earlier failure than newer ones are subject to. Nevertheless, the mechanism is hardly arcade quality and is likely to need replacing sooner than most other joysticks.
With the firing button in the upper left-hand corner, the Atari joystick is clearly designed with the right-handed player in mind, i.e., the joystick is operated with the right hand and the firing button with the left. Of all of the switchtype joysticks tested, the Atari took the highest amount of force to move in a given direction. Nevertheless, with a list price of $13.95 each, frequently discounted to far less, the Atari Joystick is a good buy and seems destined to be with us for a long time to come.
Newport Prostick
The main business of Newport Machine Design is manufacturing joysticks for the video arcade game industry. Now, they have taken their Model 150 arcade-game joystick, mounted it in an attractive plastic case with a firing button, added a cable, and market it as a replacement for the Atari Joystick. In all respects, it is superior to anything else currently available (with one exception--see below). The 1" diameter ball is permanently attached to the shaft so it can't come off in your hand as others occasionally do.
|
The joystick uses four leaf switches which are closed when a 1" diameter nylon "contactor" (attached to the end of the joystick) is pressed against the moveable leaf. This contactor is held in place by a spring and a "C" clip. If the user desires, this contactor may be reversed to put more pressure on the spring and thus provide higher resistance to joystick movement. We don't recommend this change, as the way the joystick is shipped provides excellent feel and positive centering.
Another good feature of the Prostick is that all parts may be replaced individually without replacing the entire unit. Thus, if the contact on one of the leaf switches becomes worn and filing with emery cloth does not restore it to reliable operation, one need replace only the one faulty switch. This is not possible with any of the other joysticks we tested.
|
If we have one complaint about the Newport Prostick, it would be with the firing button (the one component not manufactured by Newport). The button has a longer throw and is harder to press than the one on the original Atari joystick. As might be expected, this led to player fatigue in games such as Onslaught which required almost continuous button-pressing. Nevertheless, most players found that with Prostick their scores on most games could be doubled or tripled on the first play. For example, one player immediately reached the seventh screen on Snack Attack, whereas his previous high had been the third screen.
In summary, this is a superb joystick for the serious and even not-so-serious game player. Newport Machine Design was started eight years ago by Werner Marhold when he emigrated to California from his native Germany. Thus, it would be unfair to say that the Newport Joystick is the Cadillac of the industry, rather one should call it the Mercedes.
Since the Newport Prostick is not widely available in retail computer stores, we have listed the east and west coast distributors of the product.
For the do-it-yourselfer, Newport also markets their top-of-the-line Model 125A arcade game joystick. The Model 125A sports a large 1 3/8" diameter ball permanently attached to the shaft. Four high-quality leaf switches are held with machine screws and lock washers to a steel switch plate, which in turn, is held with four screws, lock washers and spacers to a heavy steel mounting plate. Four interchangeable nylon bushings come with the unit which permit two, four or eight way operation. As with the Model 150, the spring may be reversed on the contactor to provide more forceful operation.
The Model 125A Joystick along with a five foot long cable with DE-9 (Atari) connector on one end is available direct from Newport Machine Design, P.O. Box 418, Bishop, CA 93514, for $34.50 postpaid. Do not send to Newport for the Model 150 Prostick; only the Model 125A is available direct. Watch Creative Computing in an upcoming issue for an article on how to use this joystick to build your own high quality unit for the Apple, Atari, or VIC.
D-Zyne Supr Stick
The D-Zyne Supr Stick is a massive, heavy unit--by far the largest and heaviest we tested. It is, thus, most suitable for table top operation although adults will find it suitable for hand held use as well.
Most joysticks rely on a simple set of contacts or membrane switches internally to activate each of the four directions. However, D-Zyne has opted to use more reliable microswitches in place of these contacts. I can speak with some confidence as to the reliability of microswitches. One summer my job at Grumman Aircraft was replacing the microswitches used to signal the raising and lowering of the landing gear on amphibious aircraft. These switches were on planes that had been in sea water for nearly eight years. Although the microswitches were being replaced as a safety precaution, not a single one was found faulty. The other good thing about a microswitch in a joystick is that it provides tactile feedback to the player. This means that you can both feel and hear when contact has been made in a given direction.
|
Externally, the D-Zyne Supr Stick has a large 1.3" diameter ball mounted on the end of a 2" control stick. Contact is made by moving this less than 1/4" in any direction.
D-Zyne has also chosen to use a large 3/4" diameter firing button at the top center of the case. This mounting position is equally satisfactory for right or left handed players.
The cable is a longer-than-average 5 1/2'. This allows players to get further from the console, but the extra length gives the cat something to get tangled up in, and it is messier for storing. On balance, I like the longer cable, however.
In summary, this is a superb joystick and one which all of our playing panel members liked without reservation.
If the 5 1/2' cable on the D-Zyne Supr Stick is not long enough, D-Zyne Video also makes two extension cords of various lengths, one retailing for $4.95 and the other for $14.95.
Suncom Starfighter and Slik Stick
The dimensions of these joysticks are 3 1/2" x 1 1/2"--about the same size as the original equipment Atari joystick. However, because the molded plastic case is rounded on the sides and corners, it gives the impression that it is somewhat smaller than the Atari stick. It is not, but the rounded corners of the case make it much more comfortable to hold for long periods of play. Even though the Atari joystick has no sharp edges, I often find red ridges across the palm of my left hand after long games of Star Raiders or Preppie.
|
Both StarFighter and Slik Stick have an extremely short throw, much shorter than the nearly one inch throw in each direction of the original Atari joystick. Total throw distance in any direction is less than a quarter of an inch on these two sticks.
Internally, the construction of both joysticks is identical. A brass ball is mounted on the end of the joystick shaft which is gimbled in a medium soft rubber mounting. The ball represents one contact, and as the joystick is pressed in one of the four directions (N, S, E, W), it makes contact with a small metal tab. If it is pressed to an intermediate direction (NE, etc.), it makes contact with two tabs. In theory this design should give the joystick longer life than the original equipment Atari stick. This theory seems to be backed up by the manufacturer who provides a two-year limited factory warranty on StarFighter.
|
We did have a slight problem with StarFighter failing to make contact in the left direction as a result of the rubber mounting being slightly off center. We suspect this may be because it was a prototype, and we assume the quality control will be improved in the actual production models.
The only difference, internal or external, between the two sticks is the control handle itself. The handle on StarFighter is 2 1/8" x 3/4" in diameter and is rounded at the top. It is made of a hard plastic material. While some players liked this design very much, others who were used to gripping a ball (such as that found on the Newport Prostick), complained that their hands slipped off the top. However, for those who like a ball, Suncom offers Slik Stick with a 7/8" diameter ball on top of the 1 7/8" shaft.
The control cable on both joysticks is six feet long, compared to the four foot cable on the original Atari Joystick. This is a mixed blessing. While it allows players to sit further from the console, it also means there is more cord to wind up, and, in least in my case, something for the cat to play with as he attempts to distract me from a game of Preppie.
StarFighter costs $16.95 and comes with a two-year warranty. The price of Slik Stick is $9.95; it has a 90-day warranty.
Suncom offers another product in which left handers will rejoice. Most joysticks with the firing button in the upper left are, of course, oriented for right-handed players. While Creative Computing magazine published a simple way of opening the joystick and reconnecting the inside connectors for left-handed operation, this may not be a satisfactory solution in all cases--for example in a family where there are both right- and left-handed players.
Suncom has a different approach. It is a short cable with a male plug on one end and a female receptacle on the other which goes between the cable of any standard Atari joystick and the computer or VCS. After plugging it in, the joystick is simply rotated 90' to place the firing button in the upper right corner. A label (included) may be stuck on top of the joystick to identify it as a lefty top if desired.
Zircon Video Command
Remember the Fairchild Channel F video game unit? Everyone liked the joysticks. Channel F didn't survive, but the joysticks did, and Zircon bought them.
|
The Video Command Joystick is a replacement for the Atari joystick. It is about 5" long and, 1 1/2" in diameter, designed to be held in one's hand. The moving joystick control at one end may be controlled by the thumb of the hand holding Video Command or by the other hand. The firing button is built-in; depressing the entire joystick mechanism closes the contact.
We found this to be an outstanding replacement for the Atari joystick in most games--most games for the Atari that is. Its short, positive throw coupled with the built-in firing button makes playing games such as Star Raiders and Onslaught a positive joy. It is also excellent for most games on the Atari Video Computer System.
However, since movement is so easy with Video Command, it is not a good choice for playing games which require positive movement and a return to the center position between movements, i.e., Pac-Man and Berzerk and their derivatives. For these games we found the more positive spring mechanism in the standard Atari joystick highly desirable.
Le Stick
Le Stick is a switch-type (Atari) joystick with a difference: there is no movable joystick! Le Stick is designed to be held in one's hand and simply moved forward and back, right and left to signal the program what you wish to do. It achieves this amazing action by having a set of mercury switches inside which detect when Le Stick has been tilted 20 degrees or more in one direction. The firing button is still of the conventional type and is found on the upper end of Le Stick. It is designed to be pressed with the thumb.
|
Le Stick has another internal switch which is activated by squeezing the handle. This "turns off" Le Stick and prevents any signal from going to the computer until it is released. We haven't found any use for this with commercial games, but it might be handy when writing your own.
We found that Le Stick takes some getting used to. Indeed, some players found it so "foreign" that they elected quickly to return to a conventional type of joystick after our test was over. Other players, on the other hand, loved Le Stick--especially the freedom to play with one hand.
Of all the joysticks tested, Le Stick was the most different. People had no middle-of-the-road opinions about Le Stick; they either hated it or loved it. We advise trying out Le Stick at a dealer or show; you may well find that is the joystick for you.
APPLE PADDLE CONTROLS
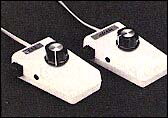
A2D Paddles (2002)
The A2D model 2002 paddle controls were physically the largest ones in this test. Children or women with small hands may find these controls too large for handheld use. On the other hand, most of our players judged them just fine.
|
Since the case is nearly square and the firing button is located in the center of one side (or end), it is equally easy to use with practically any finger of either hand. All of our players liked the large size (0.6" square), short throw, and positive click of the A2D firing button.
The knob is just under 1" in diameter, a size preferred by most players. Rotation is easy and provides precise adjustment to any point on the screen.
A diode isolation circuit prevented us from measuring the resistance of the potentiometers in the A2D paddles. However, as mentioned above, they provide precise control to any point on the screen.
The ribbon cables are a generous 8' long. Unfortunately, there is no indication which is paddle 0 and which is 1 (out comes the trusty masking tape). Each paddle has an internal trim adjustment, however, no instructions are given for using this and we assume, that once adjusted at the factory, there should be no further need for user adjustment.
Apple Paddles
Early Apple owners will remember the flimsy plastic paddles with miniscule firing buttons that came with the original Apple computers. Over the years, the design has changed several times; we tested one of the common types for comparative purposes. The paddles currently sold by Apple are described below.
|
The Apple Paddle is a small rectangular unit designed for handheld operation. The knob is just over 1 1/4" in diameter which most of our panelists deemed to be the "right" size. Not so for the firing button. It is minute (3/16" diameter) and leaves a nasty indentation in the finger pressing it.
The placement of the firing button on the left top of the case is less than optimal. In this position, it almost requires that the paddle be held with the left hand and the firing button operated with the thumb while the right hand attends to the knob. Left-handed players will find that they must hold the case in their palm, reaching around to the top with the index or middle finger of the right hand to operate the firing button while turning the knob with the left hand. This sounds a bit awkward, but at least it allows one to alternate between two fingers doing the firing when the indentation in one becomes unbearable.
All in all, the Apple Paddle makes it obvious why a replacement market has sprung up to produce more user-friendly devices.
Incidentally, it is possible to improve the old Apple Paddle controllers dramatically for about $3.00 and one-half hour of time. The improvement comes about by replacing the firing button and the control knob.
There are many momentary-contact SPST switches that will fit in place of the existing one in the Apple paddle. Find one that has a large surface for your finger (3/8" diameter or more), short throw, and positive feel. I found some at the Trenton Computer Festival Flea Market for $0.50 each.
The other thing you will want is a new pair of knobs. Look for ones about 1" in diameter that are held on with a setscrew rather than the knurled friction fit of the existing Apple paddle knobs.
Pop open the case of the Apple paddle control (some have one screw, some don't), unsolder the old switch and remove it, and install your new switch. If your new switch requires a larger hole than the existing one, you'll have to enlarge the hole with a rattail file. Solder on the wires. Be sure to use the set of normally open (NO) contacts if you have an SPDT switch. Reassemble the case. Pry off the old knob and put on your new one. You'll be amazed at the difference!
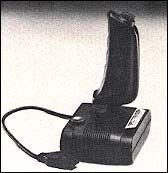
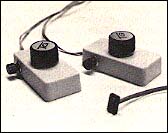
Hand Controller
These attractive, wedge-shaped controllers from the Keyboard Company (now owned by Apple Computer) are obviously designed for handheld use, though they may be used on the tabletop as well.
|
Departing from the design of other manufacturers, the firing button is located on the right side of the controller. It is a large rectangular controller which pushes down a microswitch, thus it provides both tactile and aural feedback. While extremely easy to press, some players felt that the large size of the button tempted them to hold their finger on it thus preventing the quick release required in games needing fast firing. In other words, these players felt they had to consciously both press and release the switch. On the other hand, some other players (right-handed) liked being able to control the firing button with their left index finger instead of a thumb.
The knob is a two-tiered design, the center of which is about 1" in diameter and the outside just over 2". We found this design was quite satisfactory for players who liked a small knob as well as those who liked a larger one. Detracting from the pleasing knob design, potentiometer rotation was rather stiff which some players felt hampered game play. On the other hand, I achieved my all time high score in Tsunami with this set of paddles.
A thoughtful touch is the molded "0" and "1" on the center of each paddle knob. Also thoughtful is the strain relief on the cable which goes in the notch of the Apple computer behind the game I/0 port. In addition, a grounding clip is provided which is connected to the cable shield to minimize RF interference. These were the only paddles with an external cable ground.
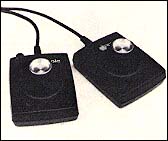
Pro Paddles
These paddles were by far the most diminutive of those tested. They measure a scant 1 1/2" x 2 1/2" and have a 1" diameter knob. A 3/8" square firebutton is mounted on the back of the paddle. A thoughtful touch is the numbers 0 and 1 inscribed on each knob. This is a far tidier way of identifying paddles than the strips of masking tape I have on the backs of other paddles.
|
The small size of the Pro Paddles was praised by some members of our panel along with the placement of the firing button which makes it very easy to hold the paddle in one hand using first or middle finger to fire while the other hand controls the rotation. The fire buttons have a very short throw and a definite tactile feel when contact has been completed which some players found to be an advantage. Having the firing button squarely in the back also does not unduly favor right- or left-handed people. On the other hand, some people felt that the size of the Pro Paddles was just too small. However, this seemed to be a matter of preference because others liked the size very much.
In place of the flat cables found on many paddles and joysticks, Pro Paddles use a round, 3 1/2' cable for each paddle. While 6" to 12" shorter than most others, the round cables seem to be more flexible than flat ones and the difference in length was not noticed. Indeed, if a game extender is used, there is no reason for joystick and paddle cables to be over 2' or 3' long.
The potentiometers in the Pro Paddles seem to be stiffer than others, i.e., more difficult to turn and adjust. One player felt that this was an illusion as a result of the small size. As we did not measure this variable, stiffness remains a subjective observation.
Apparently there are two different designs of the Pro Paddle; please see the photograph which shows the one that we tested.
In summary, the reaction to the Pro Paddle had more subjective factors than most others--small size, button placement, and stiff rotation. Some people liked the Pro Paddles very much while others were lukewarm. The best bet is to look at a pair in your local computer store or at a show before you buy.
Adam and Eve
The Adam and Eve Paddles are an attractive, hand-fitting trapezoidal shape. The firing button is on the left rear side of the case, thus making it easy for both right and left handed players to control. Curiously, paddle 0 is labeled Eve and paddle 1 is labeled Adam.
|
The knob is just under 1" in diameter which most players found convenient, particularly for fast movement from one end of the rotation to the other. Movement of the potentiometers was easy and precise.
The 3/8" square firing button has a very short throw and a positive click when pressed, thus providing both tactile and aural feedback.
Each potentiometer has a trimmer control which allows the paddle to be matched precisely to your computer or particular games. These were the only paddles with an adjustment of this type. This trimmer is also said by the manufacturer to be able to compensate for excessive wear, a useful feature.
The five-foot cables to the paddles are more flexible than most and Tech Designs has thoughtfully provided a stress relief at the DIP connector end to prevent the cable from being pulled out of the back of the Apple.
In summary, we felt the Adam and Eve paddles were exemplary in all regards.
TG Super Paddles
The TG paddles are rectangular in shape with the firing button on the left rear side of the case. This position is suitable for either left or right handed players. The size lends itself to either handheld or table top use.
The firing button is a large 0.6" in diameter but, unfortunately, has a fairly long throw and no positive feedback when contact is made. Some players felt that this button provided less-than-precise control of firing and also contributed to finger fatigue. Other players barely noticed.
|
The knob was the largest of any paddles tested, 1 1/4" in diameter. Since most games use only a portion of the potentiometer rotation, theoretically a large knob can be adjusted more precisely. Indeed, with our playing panel, the size led to sharply divided feelings: some players liked the large knob very much and others did not. On the other hand, all players agreed that the TG paddle could be adjusted very precisely and that the potentiometer was exceptionally easy to rotate.
Older TG paddles used a round cable, while new ones are coming through with ribbon cables and improved DIP connectors. There are no cable strain reliefs. Paddle 0 is designated by a red TG logo and paddle 1 by a black logo, a thoughtful touch (assuming you can remember which is which).
Zircon Alpha Command
Under pressure from the FCC because of excessive RF radiation, Apple Computer stopped shipping paddles with their computers about 1 1/2 years ago. Did you ever wonder what happened to all of those paddles in stock? Well, we can't be sure, but indications are that the latest models were bought up by Zircon and are now being offered as the Alpha Command paddles. If they are not the exact Apple paddles, they are an awfully good imitation.
|
Designed for handheld use, the Alpha Command paddles have a firing button on the right side of the unit. The paddle is shaped so that either left or right handed players will be able to hold it and press the fire button with either thumb, index finger or middle finger. The firing button has a relatively long throw and is concave in shape (outer lip higher than inner part of the button), hence it is somewhat uncomfortable for sustained firing. Also, some of our panelists were not pleased that the button did not provide either tactile or aural feedback.
On the other hand, the two-tiered knob was judged easy to move and met the needs of both those players who like a smaller knob (1" in diameter) and those who like a larger knob (1 3/4" in diameter). Adjustment of the potentiometer was accurate and precise on all games tested.
The cables are round and flexible and just over 4' long. They do not have a strain relief or shielding.
If you are looking for a bare bones, but adequate set of paddles, the price is right on the Alpha Command from Zircon.
Kraft Paddles
The first thing that strikes one about the Kraft Paddles is that they are big. Measuring a bulky 4" x 4" x 2 1/4", they were by far the largest of the eight sets of paddles that we evaluated. The knob is correspondingly large, measuring 2" in diameter. The top of the case slants forward at about a 10 degree angle thus making the paddles most suitable for table top use. While people with large hands may find them suitable for handheld operation, most of our panelists preferred to use them on a table top or in their lap.
|
Upon picking up the Kraft Paddles for the first time, most of our panelists were surprised that the knob didn't rotate very far, 60 degrees to be exact. Indeed, the full resistance (0-150K ohms) is reached in just 54 degrees of rotation. This contrasts with a "normal" paddle (or potentiometer) which has over 300 degrees of rotation.
Apparently the designers of the Kraft Paddle felt that a short throw (or rotation) would give quicker response on the screen. They are right! Indeed, you can move missile bases, space ships, and other objects across the screen so fast that movement in some programs appears quite jerky. On the other hand, there is no denying that the paddles provide extremely quick response.
We were initially afraid that this type of design might sacrifice something in precision adjustment. In other words, if 150K ohms is spread over 300 degrees of rotation, virtually any point on the screen (in the X or Y direction) may be addressed by one paddle or the other. However, if this same 150K ohm resistance is confined to just 54 degrees of rotation, we were afraid that not every point could be addressed precisely. However, this was not the case. Every point could be reached, although holding the paddle steady on a particular point (for instance to get the bonus targets in County Fair) was something else again! If you get the jitters after a cup of coffee, even a wee little bit, you won't be able to hold this paddle steady.
A feature which received mixed reviews from our panelists was the knurled knob design. People who grip the paddle quite intensely found themselves with miniature ridges on their fingers after a particularly grueling game of Tsunami.
The firing button is located on the upper left corner of the paddle housing. It is 3/8" square and has a relatively long throw. Although it does not provide aural or tactile feedback, we found that it gave good control and was not fatiguing in long use.
The cables are a generous 5' long and are more flexible than most. A curious element is a short wire with an alligator clip at one end attached to the DIP connector that plugs into the game port. The instructions gave no clue as to what this is for. A phone call to Kraft revealed that it is a grounding wire for the cable shield and should be attached to the chassis ground of the Apple (a mounting bolt is satisfactory).
In summary, the Kraft Paddles are unusual because of their large size and their short 60 degree rotation. These features had strong appeal for some people. However, because they are significantly different from other paddles, we advise that you take a look at them and perhaps play a game or two in your local computer store to be sure that they will meet your personal needs.
APPLE GAME PORT EXTENDERS
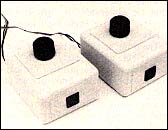
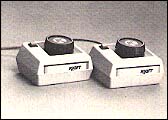
E Z Port
EZ Port from Versa Computing is a simple, straightforward extension I/0 port for the Apple. It comes with a long 24" ribbon cable which probably makes for lots of RF interference but permits EZ Port to be mounted practically any place you desire: top, bottom, right, left, etc.
|
The device itself measures a diminutive 1 1/2" x 2", just large enough for the cable connector and a zero insertion pressure DIP socket. Using this ZIP socket, you merely plug in the DIP connector from your joystick, paddle, etc. and throw a small switch which engages the connections within the socket. Mounted on the right side of the Apple, pin 1 is up and toward the front, a convenient position since the notched part of DIP plugs corresponds to pin 1. All in all, EZ Port is a simple, handy device.
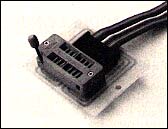
Happ Game
Socket Extender
This simple, functional device consists of a small PC board on which is mounted a zero insertion pressure 16-pin DIP socket with a sticky back designed to be mounted on the right side of the Apple case.
It has a 24" flat ribbon cable which can be snaked through the bottom or top of the Apple terminating in a DIP plug which goes into the game I/O port on the motherboard. To connect paddles or joysticks, the DIP connector is simply plugged into the ZIP socket and the small lever switch thrown to the up or down position depending on how the board has been mounted.
|
Although Happ recommends that the board be mounted with the switch in the down position, we found it far more convenient to mount it so it was facing up and toward the front of the Apple case. In this position, pins 1 and 16 are toward the top which conforms to our recommendation identifying the end of the DIP connector with a small dab of liquid paper or white paint. Furthermore, in this position the cable leads to the back of the Apple case and can be neatly snaked out of the way.
The device works well and is a bargain at the suggested $14.95 retail price.
A second version, Model GS-2, is the same as the GS-1 with the addition of an extra female socket on the male plug end (inside the Apple case). This is useful for certain decoder chips and other devices which must always be plugged in and work in parallel with paddles, joysticks, etc.
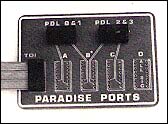
Paradise Ports
On the 2 1/2" x 3 1/2" surface of this game extender device are mounted two switches and a jack to the 18" cable that plugs into the Apple game port. In addition, four sockets are provided to plug in paddles, joysticks, etc. The design is unusual in that the sockets are actually a part of the printed circuit board itself. Sockets A, B and C are switchable, while socket D is permanently wired in parallel with the Apple game port. Socket A always goes into paddle port 0 and 1, while socket C always goes into paddle ports 2 and 3. Socket B may be switch selected for either one or both.
|
The entire back of the blue printed circuit board is covered by a rubber cushion pad. Together, the PC board and pad are only 5/16" thick. While the instructions state that Paradise Ports is "mountable on Apple case," short of using Contact cement or drilling screw holes, we could not figure out an easy way to mount it on the case. Nevertheless, its compact size means it does not take up much space on a desk or table.
TG Select-A-Port
Select-A-Port is an extender which allows up to five devices to be selected singly or simultaneously for input to the Apple. It is relatively compact, measuring 6" x 3" x 1/2" and has five DIP sockets with a switch above each one. With four small rubber feet, it can be used flat on the surface of a table or a desk or even the top of the Apple. In addition, two small plastic mounting brackets are included which permit it to be suspended from the cooling fins on the left or right side of the computer.
|
Socket number 1 is a non-switchable Socket which directly parallels the game I/O port. This is for sensitive devices with which diode isolation would interfere.
Sockets 2-5 are diode-isolated and switch selectable. Socket 2 modifies the device plugged into it to operate paddles two and three which is useful in applications requiring dual joysticks or four game paddles. Sockets 3 to 5 parallel the game I/O port and are useful for paddles, joystick, light pen, etc.
The instructions provided with Select-A-Port are scant but sufficient.
Select-A-Port is well designed and functional. We particularly like the individual switches on each port which allow external devices to be used one at a time or several simultaneously, something not possible with other extension port devices. The compact size is also a decided plus.
Paddle Adapple
Paddle Adapple goes one step beyond a game port extender in that it may be used in two modes. First, it may be used as a simple switch between two game ports; second, it allows for up to four paddles or two joysticks to be input to the Apple.

|
Paddle Adapple, consists of a 2" x 3" sticky backed PC board on which are mounted three DIP sockets (one input, two output), a small switch, and a jumper socket.
To use Paddle Adapple as a switch, one device is simply plugged into DIP socket A and the other into B. The small side switch is moved to either position A or B thus selecting that device. In this mode the six jumpers installed with the unit as it is shipped are left in place. However, it is possible to change two jumpers to reverse paddle 0 and paddle 1 in case you have worn out your paddle 0 from playing too many games.
The second mode of operation uses the jumper socket to provide a wide range of input combinations to the Apple. For example, two joysticks or four paddle controls may be input simultaneously to ports 0, 1, 2 and 3. Unfortunately, although the Apple accepts input from four devices, it only has three "fire button" inputs. However, a fourth input is possible using the cassette input jack at the rear of the computer. Paddle Adapple includes a plug and cable to go between the cassette input jack and the jumper socket on the unit. For those into it, this will allow four-player paddle/fire button games to be written.
The jumpers can also be used to exchange the X and Y axis on joysticks, use a light pen and paddles (or joystick) simultaneously, or use shift key modifications that plug into the game I/O socket.
The 14" cable on the Paddle Adapple permits it to be mounted any place on the right side of the computer. Our one minor complaint is that the two output sockets are not zero insertion pressure sockets. Although theoretically one should not be changing devices around much with Paddle Adapple, we regularly use three, and occasionally four, devices which must be plugged in through the game I/O port. Thus, we prefer zero insertion pressure sockets.
Another minor complaint: when mounted on the right side of the Apple case, pin 1 is down to the rear, which is not the "natural" way one might expect to plug in a device. This is a very minor complaint, as the manufacturer obviously did not intend that the devices be plugged and unplugged from Paddle Adapple with any frequency.
Paddle Adapple comes with six extra jumper cables--enough for doing practically anything as well as replacing a cable or two. It also includes a cassette input cable and a comprehensive eight-page instruction manual.
Expandaport
Measuring 6" x 4" x 2", Expandaport was physically one of the largest extension port devices that we tested. Its six input DIP sockets were also more than found on any other device. They are clustered in three pairs on the top of the unit along with a small three-position toggle switch.
|
The instructions recommend that connector J-1 be used for game paddles and J-2 for a joystck. J-3 is wired for an additional joystick input (or two paddles) to ports 2 and 3. It is recommended that J-4 be used for a lightpen. These three inputs (J-1, J-2 and J-3 together and J-4) are selected with the three-position toggle switch.
Two additional sockets labeled J-5 are also available. It was not clear from the instructions how these were selected. Trial and error proved that they were both permanently wired in parallel with the input I/O and the position of the switch has no effect on them.
Expandaport also has a small speaker mounted in the left side of the unit and a cable which plugs into the Apple speaker connector on the right front of the motherboard. We have long been proponents of an external speaker for the Apple and found that it has ample power to drive a good quality 8 ohm extension unit. Indeed, the volume from an inexpensive $15 or $20 speaker is five to six times that from the internal Apple speaker. Thus, we had great expectations for the Expandaport extension speaker. Alas, the reality is that the sound is of lower volume and quality than that provided by the internal Apple speaker. The speaker in Expandaport is smaller than that in the Apple and has a sound reminiscent of the earphones that came with early transistor radios.
Expandaport comes with a generous 33" cable. Unfortunately, the instructions are not equally generous in their explanation of how to use the device. The best part of the instructions is the program which tests every function of every device that can be plugged into Expandaport. On the other hand, the instructions do not tell the user what to do about software protection devices, and lower case adaptors, which may require use of the game I/O. (They can be plugged into J-5).
In summary, for most applications, the paucity of instructions will pose no problem. Our advice: ignore the speaker and look at Expandaport as a versatile, convenient, expansion I/O port device.
CJM Applexpander + S
The Applexpander is part of the CJM Microsystem, a comprehensive input, output and control system for the Apple. It differs from all the other expanders in that the Applexander uses Cinch Jones plugs and sockets, thereby requiring the purchaser to use only CJM components. A Jones plug to DIP socket converter is offered by CJM, but that seems to be defeating the purpose of the Microsystem.
As mentioned, this is more than just an extension port. We will first look at the input capabilities and then the output/control capabilities. Like other expansion devices, the 18" ribbon connector is designed to snake through the top of the Apple case after it has been plugged into the Apple game I/O port. The instructions refer to a diagram A for mounting the Applexpander on the case, but there was no such diagram in the manual. On the other hand, it was not difficult from the position of the sticky backed tape on the side of Applexpander to determine how it should be mounted on the right side of the Apple case.
|
Applexpander has two input sockets which can accept the usual two paddles, one joystick, light pen, or other input sensor as long as the device terminates in a Cinch Jones P-306 CCT plug. A full complement of such devices is available from CJM or the Jones plug may be installed on the cable of existing devices. Although a wiring diagram is provided in the back of the manual, we don't recommend doing this if it is your first construction project. If you have built at least one Heathkit, you'll have no trouble installing a Jones plug.
Input socket 1 is connected to paddle port 0 and 1, while input socket 2 goes into ports 2 and 3. These are not switched sockets; both are permanently connected. Five pages in the rather comprehensive manual are devoted to describing the operation of paddles and joysticks as graphics and game input devices. Five sample programs are included which demonstrate these concepts.
The "+ S" in the name of the device refers to " + Speaker." Three twisted wires from the Applexpander are snaked through a cooling slot and are used to connect to the internal Apple speaker output and the speaker itself. Applexpander has a mini phone jack on the left front of the unit which provides for an external speaker to be plugged in. Additionally, Applexpander has a volume control which adjusts the volume of the internal or external speaker. If an external speaker is plugged in, the internal one is automatically turned off.
Although the Apple accepts input from four potentiometer devices, it only accepts three switch inputs through the game port. Assuming one has the CJM Microstick, switches 0 and 1 are located on it. However, for some applications it may be desirable to be able to trigger the third switch (SW2) without having another joystick or set of paddles. Applexpander provides this capability in the form of a small pushbutton switch on the case of the unit.
Located adjacent to the pushbutton for switch 2 is a mini-jack. The function of this jack is to allow an external switch to be read into the SW2 input. The switch and jack are in series. The jack accepts only normally closed switches, but any number of these external NC switches can be wired in series and plugged into the mini-jack. If one of the switches is thrown, then the Apple will read SW2 as thrown.
This type of system can be used for security. For example, a series of switches around the house can be wired in series and if any one of them is thrown, the Apple would "know" it and could turn on an output module through the control box described below which, in turn, could turn on an alarm.
Another application might be a "failsafe," in which the Apple is used as a controller. Tripping a limit switch would halt the Apple and the system would shut down with the Apple signalling a warning.
In addition to the input ports on the game I/O, the Apple also has four annunciator outputs. These outputs are controlled by "soft switches," which is the term used to designate an output which is switched on from one memory location and switched off from another. For example, for annunciator 0, memory location -16295 is the on switch and -16296 is the off. To throw the switch on or off, its appropriate memory location should be loaded with 00. This is accomplished with POKE (address) 00 from Basic or, from machine language, an LDA $300 then STA (hex address). These routines are fully described in the CJM Microsystem instruction manual.
You may be saying, "This is fine, but what's it good for?" By itself, not much. But with an additional relay control module, these output switches can be used to control a wide variety of household devices such as a video tape recorder, lights, security devices, hi-fi system, or anything at all that can be turned on or off. In other words, with the addition of a relay box, the Apple soft switch becomes a real-world hardware switch.
In summary, the Applexpander + S is the heart of the comprehensive CJM Microsystem. The rugged Jones plugs will probably last far longer than the Apple itself. Used only as an extender, the unit is somewhat pricey. However, considering the additional output and control capabilities, the extension speaker, and the access to switch 2 open up many new possibilities and put the CJM Microsystem into a unique niche in the market.
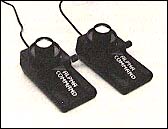
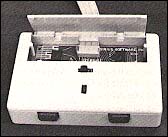
Sirius Joyport
(Review by Randi J. Rost)
The Joyport is Sirius Software's first entry into the hardware field. It consists of a small plastic case about 6" x 4" x 1" that contains four I/O ports. The joyport serves as a game socket extension. In addition, it is an expansion to allow the use of two sets of Apple game paddles (with all four pushbuttons operational) as well as two Atari-type joysticks.
The Joyport user's manual is a 20-page document that contains several diagrams to aid in proper installation. The manual also contains instructions on using the Joyport and source listings of two example programs, one in the Applesoft Basic and the other in Pascal.
Besides extending the game I/O socket, the Joyport also allows the Apple to recognize input from Atari-type joysticks. Two switches on top of the Joyport allow you to select which device (or devices) plugged into the Joyport will be active. One switch allows you to choose between activating the two Atari ports (front) and the two Apple ports (back). A second switch allows you to choose whether the left, right, or both ports are activated.
Before going any further let's set the record straight about some of the things that the Joyport cannot do. Most important, existing programs that use Apple game paddles will not work automatically with Atari joysticks once the Joyport is installed.
Games that use game paddles will be completely compatible with the Joyport when you use game paddles plugged into the Joyport. If you want to use Atari joysticks you must either modify your games yourself, or buy software written expressly for use with the Joyport and Atari joysticks.
|
Why hasn't someone come out with an adapter for the Atari joystick before now? Simple: the Atari joystick works on a completely different principle than Apple game paddles or joysticks. The Atari joystick consists of five switches, that's all. No potentiometer, just five switches. One of these switches is for the fire button, the other four represent the four cardinal points of the compass. If you push the joystick left, the "west" button will be depressed internally. If you push the joystick down and to the right, both the "south" and "'east" buttons will be depressed. Diagonal movement is detected when two buttons are depressed simultaneously (e.g. up and left equals northwest).
In order to obtain values for all five switches, the Joyport must be accessed twice. The first time, annunciator 1 is "off", (accessing location $C05A will turn if off) and the Joyport returns values for the fire, "east" and "west" buttons in the locations for pushbuttons 0, 1, and 2 respectively. Accessing location $C05B (turning annunciator 1 "on") will signal the Joyport to return values for the fire, "north, " and "south" buttons in the same three locations.
Thus, to obtain values for all five buttons, first look at locations $C061-$C063 with annunciator 1 "off" to read values for the fire, "east" and "west" buttons. Then access locations $C062 and $C063 again with annunciator 1 "on" to get values for the "north" and "south" buttons.
As you can see, the Atari joysticks will behave much differently from Apple game paddles. They have absolutely no effect on the game controller locations ($C064-$C067) that are used to interpret the current paddle position. It is for this reason that existing software will not automatically run using Atari joysticks instead of Apple paddles.
Despite the incompatibility, the Atari joystick provides another distinct advantage: input can be obtained much more rapidly. This is because of the way the Apple paddle works. To read the paddle, the timing circuit is reset and all game controller locations are set high (they contain values greater than 127). The time it takes for each location to drop below 128 is proportional to the setting of the game paddle. Button inputs can be read with virtually no time delay.
Another difference is that the Apple paddle pushbutton locations will contain a value greater than 127 if the button is being pressed. The Atari joystick buttons cause just the opposite to take place: a value less than or equal to 127 signifies the button has just been pressed. This is a function of the Joyport. It ensures compatibility with the shift-key to pushbutton input two (pin 4) modification many users have made.
How does the Joyport work when the back switch is set to "both"? This position indicates pushbutton input should be accepted from both devices on the active side of the Joyport.
With the back switch set to "both," paddles 0 and 1 are obtained from the left side of the Joyport and paddles 2 and 3 are obtained from the right side. Turning annunciator 0 "off" (accessing location-$C058) will allow pushbutton inputs on the left side to be read normally. Switching it "on" (referencing location $C059) allows pushbuttons on the right to be read.
The Atari inputs are obtained a little differently. A second annunciator (number 0) must be "on" when input is to be read from the left side and "off" when input is to be read from the right side. The table shows all the combinations of this switch.
Software Compatibility
As you can see, a program must be written specifically to take advantage of the Joyport, or it must be modified to do so. I have succeeded in modifying a few of my shoot-'em-up games to accept input from the Atari joystick, and am quite pleased with the results.
Listing 1 shows the steps necessary to convert Creative Computing's Super Invader. You may wish to check the starting address of your version by typing: PRINT PEEK(-21902) + 256 * PEEK (-21901) after you have BLOADed the program. If the result is 512, you can follow the steps as shown in the table. If the address is 768, save the modified version by typing BSAVE INVADERS (JOYPORT), A768, L24100.
Sirius is currently marketing several games that may be played with an Atari joystick connected to the Joyport. These include Gorgon, Copts and Robbers, Outpost, Hadron, Snake Byte, Twerps and Borg. Gebelli's Horizon V may also be played with an Atari joystick by typing control-shift-p at the beginning of the game. Sirius has sent free Joyports to some of the major game publishers, including On-Line and Broderbund, in order to encourage development of compatible software.
]BLOAD INVADER.MACH
]CALL -151
* 168E: 90
* 16D5: 90
*12FF:20 01 60 10 04 A0 AA EA EA
*6001:AD 5A C0 AD 62 C0 10 0A
*:AD 63 C0 10 08 A4 1A A9
*:7F 60 A9 00 60 A9 FF 60
*3DOG
] HOME
] BSAVE INVADER.MACH (JOYPORT),A512,L24100
Listing 1. Patch that will let you play Creative Computing's Super Invader with an Atari joystick using Sirius Joyport.
The Joyport has a suggested retail price of $74.95 and includes a copy of Computer Foosball (1-4 players).
It should be emphasized that although the Sirius Joyport and Astar Octa Stick both accept input from a switch-type (Atari) joystick, they are not interchangeable (See Octa Stick review below).
Astar Octa Stick II
The Octa Stick II is an interface for using an Atari-type joystick with an Apple. As mentioned above, this type of joystick is either completely on or off in a direction and, if pushed diagonally, can activate two switches.
The heart of the mechanism is a small interface consisting of a 16-pin DIP plug, a male receptacle for a DB-9 Atari joystick plug, some resistors and relays and two trim potentiometers.
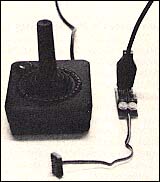
|
Since this type of joystick returns only three values in each of two directions (center, up, down or center, left, right), the center value may have to be adjusted so it does not look to the program as though the joystick has been pressed. "Normally" the three values returned are 0, 127, and 255. However, a program written for both continuously variable as well as switch-type joysticks may be written to accept the values 100, 120 and 140 indicating directional movement. For a program of this sort, it may be necessary to adjust the center (off) value of Octa Stick.
It should be emphasized that although the Octa Stick interface and Sirius Joyport both accept input from a switchtype joystick, the output to the computer is quite different. Octa Stick puts out three resistance values which can be thought of as simulating the left, middle, and right position of a potentiometer-type joystick. Games written for the Sirius Joyport cannot be used with Octa Stick while games like Thief and Snack Attack work well with Octa Stick but not the Joyport.
The Octa Stick II interface has a sticky back permitting it to be mounted on the side of the Apple. Unfortunately, the cable is only six inches long which means that if Octa Stick is one's only interface, it must be mounted well to the back of the Apple case. However, if it is used in conjunction with an extension port it can be mounted toward the front right of the case.
In summary, we found the Octa Stick interface with a Newport or Atari joystick considerably better than potentiometer-type joysticks for playing the Pac-Man and Berzerk families of games.
Happ Hi-Fi Adapter for Apple
We have mentioned several times on these pages that the built-in Apple speaker leaves a lot to be desired and that a great improvement in sound can be obtained by replacing the Apple speaker with an external one. For maximum convenience, we have recommended that an SPDT toggle switch be installed on the side or back of the case to make switching between the two speakers convenient.
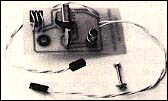
|
Now Happ Electronics has come along with an even more exotic and convenient device. The Hi-Fi Adapter consists of a small PC board which is mounted on the right inside of the Apple case. The handle of a toggle switch extends through the cooling fins on the right of the Apple case. The unit plugs into the Apple speaker connector and has two outputs. One simply connects to the internal Apple speaker and with the toggle switch down, allows for "normal" operation. With the toggle switch in the up position, the sound is routed through a small isolation transformer to the input of a hi-fi amplifier.
As anyone who has tried to connect the Apple speaker output directly to a hi-fi amplifier knows, both sides of the speaker output are above ground and connecting one side to the ground of an external amplifier creates havoc in the Apple. This havoc takes a variety of forms, the most common of which is the equivalent of constantly hitting the reset key. Needless to say, this is highly undesirable. The Happ Hi-Fi Adapter cures this problem and makes it possible to run the speaker output through a hi-fi system.
Since the Apple puts out only one channel of output, we recommend for amplifiers without a monaural switch that a Y connector be used to split the signal into two channels. Short connector cables (one RCA female input, two RCA male output jacks) are available from Radio Shack and other electronic supply houses for about $2.00.
If you have not used an external speaker (or amplifier), we can confidently predict that you will be astonished at the results.
The Happ Adapter comes with a short program called Apple Bagpipes. After typing it in, you will be able to achieve a wide variety of different sounds by simply typing one key from the keyboard. Although the instructions do not state this, in order to try out different sounds, you must press reset and run the program again for each different sound. This program gives only a small sampling of the possible sounds available from the Apple. Electric Duet from InSoft and games such as Juggler or Tumble Bugs demonstrate a much wider range of possibilities.
The documentation included with the Hi-Fi Adapter was excellent, particularly the photographs which showed exactly how it was to be installed.
We found the device substantially enhanced the fun of playing games on the Apple and was well worth $25.
BUTTON CONTROLLERS FOR ATARI AND VIC
If you like the idea of a pushbutton controller, but lack the time, talent, or inclination to construct one, you may want to purchase one of the ready-made controllers described below.
Starplex Controller
The Starplex controller from Starplex Electronics, offers an authentic "Asteroids-style" button configuration, as well as the fastest set of pushbuttons I have ever seen. In addition, an optional AA battery powers a "rapid-fire" mode, automatically repeating fire faster than you can do it by hand.
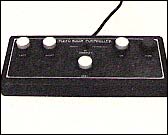
|
Because the pushbutton array is large and has a light touch, the controller takes a bit of getting used to. Eventually, however, I found that the lightning fast direction changes possible with Starplex resulted in higher scores.
It should be mentioned that because many games do not allow a new shot to be fired until an old one leaves the screen, the "rapid-fire" option will not always work optimally. Still, you can fire continuously merely by holding the button down, rather than having to repress the trigger for each shot (or battery of shots). Over the long haul this reduces fatigue, and the incidence of "joystick elbow."
The unit lists for $29.95, which is a bargain for the most authentic game of Asteroids this side of the coin-op. It improved my score on several other games as well.
KY Enterprises
The controller offered by KY Enterprises uses a directional-style configuration, less suitable for Asteroids but more versatile overall. For those unfamiliar with the arcade configuration, it is much easier to master this logical layout.
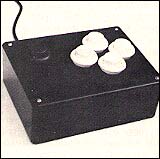
|
The unit exhibits extra sturdy construction--as if its makers knew it would have to withstand a few bounces off the floor. It is very large, and can be cradled or used on a tabletop by even the tiniest kids. The buttons themselves sit in raised collars, and though not as fast as the buttons on the Starplex unit, appear to be the "regulation" coin-op standard. They are large and easy to control.
The KY Enterprises controller is priced at $19.95, and is available in left- or right-handed models. They also manufacture controllers for the handicapped.
Accu-Play
A third pushbutton controller, the Accu-Play Control Board, we did not have an opportunity to test. It sells for $29.95 from Accu-Tech Products.
|
|||||||||||||||||||||||||||||||||||||||||||||||||||||||||||||||||||||||||||||||||||||||||||||||||||||||||||||||||||||||||||||||||||||||||||||||||||||||||||||||||||||||||||||||||||||||||||||||||||||||||||||||||||||||||||||||||||||||||||||||||||||||||||||||||||||||||||||||||||||||||||||||||||||||||||||||||||||||||||||||||
|
|||||||||||||||||||||||||||||||||||||||||||||||||||||||||||||||||||||||||||||||||||||||||||||||||||||||||||||||||||||||||||||||||||||||||||||||
|
|||||||||||||||||||||||||||||||||||||||||||||||||||||||||||||
|
||||||||||||||||||||||||||||||||||||||||||||||||||||||||||||||||||||||
|
||||||||