REVIEW
Atari ST Realtizer
Print Technik
Marketed in USA by Michtron
576 S. Telegraph
Pontiac, Ml 48053
Low or high resolution,
$199.95
Reviewed by Maurice Molyneaux
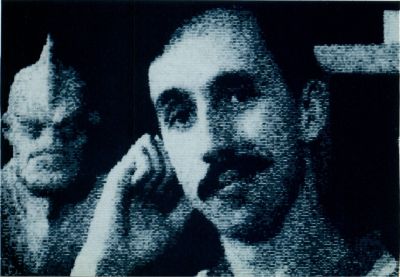
After the debacle of the software that (now defunct) Hippo packaged with their digitizer, it became common to turn a wry eye on any video digitizers for the ST. Then Digital Vision released color and black and white ST versions of their popular ComputerEyes, and at last we could get decent digitizers. Now Michtron has entered the fray, distributing the Atari ST Realtizer, manufactured by the German company Print Technik. The Realtizer's packaging says it is "for Quick Snapshot Digitizing." Scanning time is listed as between 1/50 and 1/2 second! The accompanying software includes programs for digitizing in gray scales and in color.
The Realtizer itself is a small black box—approximately three inches on each side and just under an inch tall—with a connector that plugs into the cartridge port of your ST. On the top of the unit is a standard RCA female jack for receiving the video cable from your image source. The software is provided on one single-sided disk, which is not copy protected. You are, in fact, instructed to make a backup before using the digitizer the first time.
With your ST off, you plug the digitizer into the cartridge port (RCA plug side up), hook it up to your camera, VCR, etc. (you'll need your own cable—none were supplied with the Realtizer I used), then boot your ST and run one of the digitizing programs. The programs are GEM driven, with most controls available via drop-down menus or alert boxes; some adjustments can be made from the keyboard as well.
Running DQUI.PRG (from either low or high resolution) puts you in what I call "monochromatic" digitizing mode, where your picture is composed of gray scales, the number of which is user selectable from two to 16. When using a color monitor you are initially presented with varying shades of gray. With monochrome various "dithered" dot patterns are used for different gray scales. If you select two shades, the shades will be pure black and pure white.
As you increase the number for shades (to 4, 8 and finally 16), more gray levels are inserted between black and white. The fewer gray scales you have, the faster the images can be digitized. Selecting two grays and turning the continuous digitize mode on results in a real-time image, but one with only two shades. Not useful for most applications, but great if you wanted to grab "silhouette" images.
If you plan to use actual grays on a color monitor, you'd probably be best off using the eight shade mode, because the ST, having only eight levels for each primary color, can only generate eight levels of gray anyway. In fact, when you boot the program in low resolution, you'll find that the same gray is assigned to two shades. In low resolution you can assign colors to various grays by selecting "Lookup." Here you click on the number of the color you want to set (the actual color is displayed to the right of the number), and then go to a color table from which to choose a hue. The table displays 96 colors at one time in a 12 × 8 grid. Clicking on a color puts it into the proper gray slot. Right-clicking advances the grid to show you more colors, apparently allowing you to choose any 16 from the full palette of 512.
Unfortunately, the way these tables are set up, it's difficult to tell if the color you think you want really is what it appears to be. Also, you can't see the colors you've previously selected while trying to choose another, making it more difficult than necessary to set up your palette. Even more aggravating is that there doesn't seem to be a way to abort to the Lookup table from the color tables without selecting a color. And, once you've chosen a color, to restore the original shade you either have to try to find that shade on the color table or Cancel the operation, which undoes everything you've done in that menu. If you've just set 15 out of 16 colors the way you want, then mess up the 16th and click on Cancel, zap! There goes all your work.
To avoid this, you should click on OK whenever you get a few colors set to your liking, then re-enter the Lookup table to continue. It seems to me a standard RGB color mixer would have simplified matters immensely. (Please note that although you can select colors in this manner, the digitizer does not actually scan in color. You are merely "colorizing" a black and white image.)
Digitizing speed isn't quite what you'd expect with the claim of 1/50 to 1/2 second. In 16-shade mode with "Fast" selected, I'd say from the moment you click on "Digitize" to when the finished image appears on the screen takes about 1 ½ seconds. This is because while the digitizer can grab the image in the specified time, it takes the software a bit longer to convert the image to an ST screen display.
The "Fast" selection under the Option menu toggles between scanning all gray levels and showing them on the screen, and scanning each gray level and displaying them separately as it assembles the image. With "Fast" on, the digitized images seem a little grainier and less detailed.
To digitize you first click on "Digi Calib," which automatically calibrates the brightness and contrast adjustment. Next you can use "PICPARA" to adjust the brightness and contrast of your picture. An alert box with buttons appears for this task. The picture is redigitized every time you make an adjustment. An easier method is to select "DIGI CQNTT" which puts the program into continuous digitizing mode. You can then adjust the brightness and contrast with the Fl through F8 keys.
When you are finished with the adjustments, pressing Escape stops the continuous digitizing. To digitize a single image merely requires you to click on "Digitize." You should use "Digi Calib" whenever you change lighting, camera angle or subject, or whenever there is a scene or POV (Point of View) change on the videotape you are using as a video source.
There are also tools for inverting all screen colors, horizontally mirroring (flipping) the image and zooming in on areas of it to see details. A "Dezoom" option returns you to the original picture after zooming.
The PRN-Param menu lets you select a printer. The supported types are Epson and C. Itoh compatibles, the Canon PJ-1080A color inkjet and Cannon LPA2 laser printers. X and Y resolution controls let you set the horizontal and vertical size of a printout, and "PRNLOOKUP" lets you set the printer's "color table," choosing dithering patterns for output, or selecting color patterns for output if you have the color inkjet printer.
To print the image you must use "Print" under the Option menu. The output from within the program is generally better than using the usual ST screen dump, and, if you are looking to digitize images specifically for printing, you'd be best off to set the grays to 16.
Screens can be saved and loaded in Neo-Chrome, DEGAS, Art Director and Doodle (high-resolution only) formats or as bit images. The color and printer lookup tables can be saved to disk, and both contained in a single file, which can be recalled for later sessions. Unfortunately, the printer selection and resolution are not saved in this file.
Color digitizing requires the DQUICL program. It works only in low-resolution mode, and, strangely, is missing the printing and picture manipulation options of the gray-scale program (you can't print, invert, mirror or zoom). Images can be saved and loaded, in Neo, DEGAS, Art Director or bit-image formats, as well as in a special RGB format that stores the actual digitized data, not just the pixels of the screen image.
To digitize in color, the manual states you must use a camera to supply video input, not a VCR. This might seem puzzling until you understand how the "real color" images are made. Packaged with the digitizer are three colored filters: red, green and blue. You must mount each filter over your camera's lens and click on the digitizing option for each color, adjusting the image until it is correct. You have to do this for each primary color!
In other words, you must shoot color separations! You have to switch filters and take the same image three times over! Try to get a person to sit perfectly still through an operation like that! If the subject moves at all, the images become fragmented, and the resulting picture looks like one of the dance scenes in West Side Story (where the color negatives were purposefully thrown a few frames out of synch so that "Maria" fragmented into several varicolored ghost images).
And, even if you can find someone rigid enough to get a good shot, chances are the colors won't be what you expect. You have to make a lot of adjustments while digitizing each separation, and also adjust the color saturation of the images. With correct lighting, and a lot of fine-tuning, I was able to get some good pictures. However, in general, I had problems with one color overpowering the picture, or trying to get a flesh tone to show up, looking something like it should.
Realtizer comes with a TOOLBOX program, which allows you to load and save pictures in Neo and DEGAS format, cut, paste, save and load blocks (called "symbols" for some reason). A symbol can be "bent" vertically or horizontally, rotated, rescaled, etc. Colors can be replaced with other colors too. This mini-paint utility is handy for making color adjustment and doing block work. Oddly, it doesn't seem to feature any kind of Draw option!
It's my impression that the weakness of the Realtizer lies in its software. As far as the programs go, they are rather simple, and could have benefitted from a little more work in the user-interface department. Items are grouped strangely, and tools like the alert box for setting brightness and contrast are not intuitive. Perhaps someone will write some new software to make this digitizer really shine.
Finally, there's the manual. This 20-page pamphlet is a sorry excuse for a real manual. Not only is it poorly organized, badly written and sloppily laid out, but it contains some flat-out mistakes. The manual makes reference to an "UN-ZOOM" selection in the PIC-OPS menu, but the item in question is called "DEZOOM" in the program. The manual refers to two options called "FILTER3" and "FILTER4," which, although they are said to be nonfunctional, don't even appear anywhere in the programs! Furthermore, there's an adjustment screw in the top of the digitizer casing, but nowhere in the manual is it mentioned. It seems to be used to adjust the incoming signal, but I had to whip out a tiny screwdriver to find this out.
The pictues taken in gray-scale mode can be pretty good, although they are a bit grainy. The color mode is an outright pain! You can get decent color pictures, but it seems more trouble than it's worth. The fact that you can't color digitize off a VCR also limits this unit's usefulness. The color ComputerEyes digitizer doesn't require this color-filter nonsense, and with the release of the Digispec program for the color ComputerEyes, I'd have to say that it's a much better choice than the Realtizer.
The black and white ComputerEyes is only $149.95, and the color version is $249.95, as opposed to the Realtizer's $199.95. In light of its price and the limits of its color digitizing software, I'm afraid the Realtizer isn't a viable option for most.