STEP 1: Making Mixed Mirages Work
BY MAURICE MOLYNEAUX
Graphics. These days it's next to impossible to work with a computer and not see them. Databases store pictures along with other data, word processors integrate text and graphics, and desktop publishing software goes even further. Heck, even the letters on your ST's screen are bit-mapped graphics, not a dedicated text-only video output. And if you play games or use a drawing program, graphics are even more unavoidable.
The graphics capabilities of personal computers have grown by leaps and bounds in the industry's brief 12 years of existence. Ever look at the "high res" graphics of an old Apple II? An incredible 280 x 192 pixels (a pixel is one computer generated dot on the screen) using eight colors! Actually, it took two of those horizontal dots to make one colored pixel. There were eight colors, but separated into two distinct, four-color palettes that were incompatible with one another, meaning you couldn't put a color from Palette 1 alongside a color from Palette 2 without color bleeding—unless the junction between those pixels fell exactly on a byte boundary! To further complicate this mess, each palette contained a black and a white color—so you actually got six colors, not eight!
The Atari 8-bits expanded this somewhat, adding numerous "modes" of different sized pixels with varying numbers of colors. Palettes ranged from a total possible 128 colors on early machines (eight luminances of 16 colors) to 256 colors (16 luminances of 16 colors). Although the normal modes limited the number of colors that could be used on a given screen (usually to four, although some GTIA modes allowed 16), with special programming every color in the palette could be viewed on a single picture.
In more recent years things have gotten better. The low resolution mode of the ST has more pixels on the screen than the highest resolution on the Atari 8-bit computers, a range of 512 possible colors, and normally allows 16 colors at once (and with special programming it's possible to put all 512 colors on screen at the same time). Medium resolution goes to 640 x 200 and four colors, and high resolution is 640 x 400 in pure black and white monochrome. Quite a jump from the Apple II! New monitors and graphics hardware soon promise modes upward of 1000 x 900 pixels on upcoming Atari machines.
So, as the hardware gets more powerful, the displays get better and better. Compare a Spectrum 512 picture on the ST to even the best screen on an 8-bit Atari. Quite a difference. This upward spiral in graphics capability allows images created on a computer to become ever more realistic. More colors allow more nuances in detail and shading. Higher resolution means less noticeable pixels, making the picture look less "computerized."
In fact, the whole trend in computer graphics increasingly has been to "make it look real." This month the topic of Step 1 will be hardware, software and graphics techniques that can make the ST's video output look its best.
Hues there?
Higher resolution makes smaller details possible, but what can you do when you've hit the limits of your hardware? The 320 x 200 pixel resolution and 16 colors out of 512 in ST low resolution are wonderful when compared to the graphics of the older computers described earlier, but then again those low-resolution graphics aren't so hot when compared to the output of most graphics workstations. Computer paint-box systems for video purposes (TV logos, commercials and so on) average about 712 x 480 pixels, with 256 colors out of a palette of 16 million! You don't see "jaggies" (the stair-step effect of pixels most clearly seen in diagonal lines drawn by a computer) on a TV commercial.
But resolution and total numbers of colors aren't the whole story. I've seen pictures on the ST that you wouldn't think were only 320 x 200 pixels. One great factor in computer graphics is how well you can disguise the weaknesses of your display.
Do you ever watch MTV? One of the regular spots that appear at commercial breaks is a series of short computer animations titled "Animals." Clean, impressive graphics (and funny, too, though that's not relevant here). I videotaped a lot of these, and one, titled "That Was a Wolfs Life," ended with a lightning bolt zapping the wolf/camera (it's always from the point of view of the title animal). I was curious about how the flashing effect was achieved, so I studied the lightning frame by frame. The effect was a simple white on black drawing (alternated with black on white every third frame or so to create a strobing pulse). But with the image so reduced down to two colors I was surprised by how clearly I could see the jaggies. The resolution isn't all that high. It's just that the large range of colors is used to blur the hard edges.
You can see this done on personal computers all the time these days (though not always as often as it could and should be), through a technique called "anti-aliasing." This means, in short, to plug a pixel of a medium tone between two strongly contrasting colors. If you drew a dark red triangle on a bright blue background, the jaggies would stick out like, well, like jaggies. However, if at each obvious jaggie you inserted a pixel of a medium purple color, it would soften the junction and make the stair-step effect less obvious.
This can work well with as few as 16 colors if you choose your palette carefully. The trouble is manually doing this type of work is a real headache. There is some software that can help. Tom Hudson wrote an antialiaser desk accessory (available from Tom himself), which will work on screens in DEGAS Elite or CAD-3D 2.0. Cyber Paint also features its own antialiaser function, as does Spectrum 512.
To really get good output, though, you need more colors. A few programs provide this: Spectrum 512 and Quantum Paint both boost the total number of available colors (Spectrum to the full 512 colors that the ST hardware can generate and Quantum Paint to a pseudo-4096—this done through pixel interlacing, meaning rapidly switching a pixel between one shade and another to create an effect of a hue in between.) With such programs it is relatively simple to kill the jaggies.
Getting better images onto your ST can also mean culling them from outside sources. One such source can be another make or model of computer. With the proper software a number of different graphics formats can be imported (and also exported). For example, DEGAS Elite can load Atari 8-bit "Koala" pictures (Graphics 7½ mode) and Amiga IFF picture files and then save them in DEGAS format.
The shareware Pic Switch 0.7 by John Brochu can convert not only those formats, but also Atari 8-bit Micropainter and Graphics 8 and 9, MacPaint, and CompuServe RLE (run line encoded) graphics. Another program called The C-64 Graphics Converter (public domain) by Jerry L. Bethel (BETHEL on DELPHI) will import Koala and Doodle format pictures from the Commodore 64. There are also programs for converting to and from any IFF format, as well as the GIF standard (used in the IBM world).
Although many of these programs will convert these outside images to a standard ST low or medium resolution screen, a few will allow you to import pictures directly into Spectrum 512 format, thus maintaining the appearance of a many hued picture better than whittling it down to four or 16 colors.
Smile and say "digitizer"
Drawing on a computer is rarely easy. Even given the best software tools and good input hardware (like a graphics tablet), it's still a pain compared to working in more traditional mediums. Admittedly, the drawbacks are slight in comparison to the gains. In what traditional artistic medium can you instantly change every instance of one color to another, clip portions of two images and seamlessly merge them together? Only with a computer.
But still, inputting the raw image to manipulate is rarely easy. One solution many have taken is to use a scanner or a video digitizer. These devices are used to break down images from outside sources and convert them into data the computer can display and manipulate. Both scanners and digitizers work in roughly the same fashion; it's the manner of input that differs.

A scanner is usually a device with a small sensor that is passed horizontally over an image (usually a photograph or printed picture). Each time it passes, it scans the light reflected from the source image and breaks that down into numerical data. When that pass is completed, it then scans the next line. Software then assembles all these "line passes" into a single image, which can then be saved to disk and/or manipulated.
The human hand is too imprecise an instrument for this task so the common solution is to attach the scanner to a printer, usually a dot-matrix. The scanner's "eye" is mounted on or in place of the printer's print head, and the image to be scanned is fed into the printer like a blank piece of paper would be. The controlling software then makes the printer move its print-head positioning mechanism to move the scanner across one line of the image. When it has reached the end of that line, it lowers the print head and repeats the process. Really, it's sort of like inverse printing, using the printer as an input device.
Scanners are less often used for inputting images for display on the computer's screen than for creating data for use in desktop-publishing software and other printing utilities.
A video digitizer works slightly differently. The input is usually a standard composite video line, carrying the output from a video camera, VCR, video laser disk, television or even another computer. Like the scanner, the digitizer breaks this image down line by line—actually, video scan line by scan line. Because of this, the incoming image must be perfectly still. Therefore, either your subject must hold still for the required time, or, if you are using a videotape deck, you must be able to get a clear and stable (no flutter!) freeze-frame.
The average video digitizer for the ST lakes between ten and 25 seconds to scan a picture and convert it into a ST-usable image. I'm talking about 16-shade or color images; the less tones and colors, the faster and "rougher" the scanning. There are digitizers which are known as "frame grabbers" that can "snapshot" a video image in real-time and turn it into a computer graphic nearly instantaneously. I am not aware of a digitizer for the ST that can do this, and if there is one, it is no doubt expensive.
The hardware isn't the only factor with these devices, the software that controls them can often be a major element. A number of good digitizers and scanners have been marred by buggy or inadequate software. When shopping for one of these, don't rush out and buy the first one you see or one that sounds great in an ad. Get recommendations from people who've used them. Try to see some of the actual output and find out how hard it was to get that output. I've seen some great digitized images that were nearly impossible to reproduce using the same hardware/software combination. Remember, demos are designed to look the best they can, often at great expense and time. You don't want to purchase a device that requires hours of grueling work to get one great image, when another one would give you similar results in minutes.
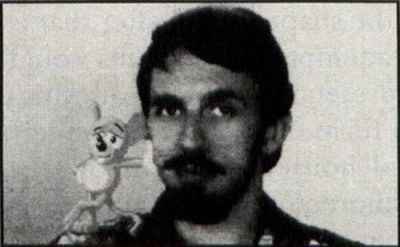
How many people have bought scanners and digitizers in order to get realistic-looking pictures and images onto their computers? I'd say a lot, judging by the numbers of digitized pictures I've seen floating around. Admittedly, a lot are converted over from other computers. The lure is strong. You can capture and then edit images. The picture of myself that is now printed with this column is a digitized and retouched image. A live image of Megabit Mouse was digitized and then the cartoon character—me—was drawn in. One neat thing about digitized images is that you can exchange them with other people who have computers with compatible graphics formats like the aforementioned GIF, IFF and so on. I have seen the faces of a number of ST-LOG associates and fellow DELPHI members only by means of digitized pictures we've exchanged over modems and by way of disks.
I have one of each of these devices (the ComputerEyes video digitizer graciously provided by the fine folks at Digital Vision), and although I rarely use them for making digital snapshots, I do use them whenever I need a realistic element in a picture or animation. For example, I digitized some pictures of my hand for a scene at the end of the Art & Film Director video where a hand catches a disk. I would have preferred to use an actual video of a real hand, rather than a digitized image, but there was no way to do that on an ST until now.
TV on your ST
A little over a year ago I wanted to animate a scene of Megabit Mouse hopping out of the ST screen and landing on its keyboard. I didn't want him hopping onto a digitized picture of the computer, but onto an actual video image of it. I had no way to do that at the time, and the shot was abandoned. However, I could now do it rather easily. In fact, with the flick of a few switches I can be typing this text right on top of MTV. These words I am typing are (at the moment I am writing them) appearing over the faces of some obscure band's rock video! A twist of a dial and the words disappear.
How can I do this? Simple, I have a Genlock installed in my Mega ST. "Good for you, but what's that mean?" I hear many of you cry. A Genlock is a device that combines computer graphics with another video signal. More to the point, it places the computer image on top of the other video signal. With this device I can mix any low or medium resolution image with standard video. I'll have Megabit Mouse walking over the titles to Star Trek IV, then I'll place a CAD-3D generated starship over CNN's Crossfire, and maybe even whip out a paint program and draw a mustache and glasses on Dan Rather! All this and more is possible with a Genlock.
A lot of us have waited for a long time for someone to produce a Genlock for the ST computers. As I write this, only one company makes such a device, and, unfortunately, the current model is not for everyone (or even most of us).
The Genlock I have is called the JRI Genlock, produced by John Russell Innovations (JRI). It is an add-on card that hooks into the ST's video-chip socket and grabs the data for the ST's screen display. In the past I mentioned that this device would hook into the processor bus on the Megas and/or the DMA connector. I was mistaken. This card terminates in a small box, external to the computer, which features six connectors. One is a composite video input (for the image to be Genlocked upon), another is composite output (Genlocked image out), image out), in addition to a composite audio out (to output the ST's sound; there is no audio input. The standard ST monitor jack is carried through another port. The actual port of the ST itself is tapped into by the Genlock and inaccessible, hence this connector, and along with it is a port which outputs the Genlocked signal to an ST RGB monitor, meaning you can view video on your SC1224! The final port is a connector for the Genlock's supplied "remote control."

On the side of the box are three recessed controls that can be adjusted with a screwdriver. One adjusts the hue like the tint control on many color TVs and composite color monitors, another the horizontal position of the computer image, and the third allows the Genlock to "lock" to the input video signal under changing thermal conditions.
Installation is not easy and requires disassembly of the ST. The case and RF shielding has to be removed, the internal power supply disconnected, and the ST's "Shifter" chip has to be removed. The Shifter is plugged into a socket on the Genlock board, which is itself plugged down into the Shifter's socket on the ST motherboard. The Genlock is hooked to the power supply, and special RF shielding must also be installed, in addition to reassembling the computer and attaching the small box with all the ports. The manual that comes with the Genlock explains this installation, but JRI prefers a trained technician to do it, or to handle the job themselves, because, apparently, it is easy to damage the board: The parts are extremely static-sensitive. JRI will install it, if you want, but you'll have to ship your computer to them.
Be warned, this device is not cheap. It's not overpriced either. However, the original planned price of $500 had to be abandoned, John Russell told me, because at that price he would not have made any money unless every board produced worked perfectly and there were no defects. Perfection is extremely rare, and to cover repair and replacement costs and labor, the price had to go up. The current list price is $650, and includes the Genlock board, remote control and a disk with three sample animations and a picture, all for Genlock testing.
Operation couldn't be simpler. The Genlock is software-independent, meaning it will work with almost anything. In layman's terms, the Genlock functions by grabbing the ST's screen and determining which, if any, pixels are a color which has been set to absolute black (000 on the palette). If it is any color but that black, it is plotted on top of the video signal coming in from the composite video-in port. If the pixel is color 000, it does not plot that pixel, allowing the video image to show through the resulting "hole." Thus, to put Megabit Mouse on the screen, all I have to do is put him on a solid black background and make certain no part of him is color 000. If I need black on a character I'll use 001, which is close but doesn't vanish like 000.
Controlling the Genlock is simple. Its remote consists of three two-position switches and a dial. The dial is used in conjunction with the third switch and allows you to either fade the computer image on top of the video image or select between the two: one or the other or a ghostly half-and-half image in between. Switch one turns the Genlock on and off. Switch two allows you to flip between color and monochrome monitors (or toggling it quickly to mono and back will reset the computer). Switch three turns "keying" on and off, which effects how the dial operates.
Genlocked output can be either composite video or to an SC1224. The composite output, which works even with the Genlock off, seems to be at least as good as that provided by Practical Solutions' VideoKey. It videotapes nicely and looks good on a TV. The Genlocked output to the ST's own RGB monitor is both better and worse than the composite output. It's better because the clarity and sharpness of the RGB output surpasses that of the composite output. It's worse because the overall image is darker, less vibrant, and, because of the combination of multiple video signals, there's a slight quiver to the screen.
There are some hardware limitations. First, the Genlock does not work in monochrome because the ST's high resolution runs at 70 Hz, and composite video is 60 Hz, meaning the timing is incompatible. Second, this Genlock does not feature "overscanning," which means making the computer image fill the entire screen. The video image fills the entire screen, but the ST image stops at the screen borders. If you make the background color black, the borders become black, and the video image gets "boxed in" as well, somewhat solving that problem.
The third and most serious limitation is that the current model of the Genlock can only be used on a Mega ST, because the board contains a fan to keep the board from overheating and to prevent heat buildup inside the Mega and sits so high it could not fit in the less roomy cases of 520s and 1040s. Also, the small box with the monitor and other connectors hangs out of the processor bus access panel on the back of the Megas, an opening which does not exist on the 520 or 1040. JRI is testing a 520 and 1040 Genlock board, but at this point cannot guarantee if and when it will be available.
Problems? Few, all things considered. I've had no trouble Genlocking with any TV signal. The only trouble I had with Genlocking on the output from a VCR was with a few tapes that I suspect have copy protection on them. My tape of 2001: A Space Odyssey produced a noticeable horizontal band of distortion on the Genlocked picture. The JRI Genlock manual warns about this.
Another small hitch appears when I try Genlocking on top of the composite output of my other ST. The Genlocked screen didn't seem to synch up properly, and would be vertically out of position many times. Interestingly, just plugging and unplugging the interconnecting video cable causes the vertical position to change, and with a few tries I can usually get them in synch. I'd guess this kind of problem can be corrected with a simple signal-synching box as used by TV stations, video-editing facilities, and even high school audio-visual classes.
The color/mono selection switch on the Genlock's remote control is neat, because with it you could plug an RGB monitor into the Genlock port and a monochrome monitor into the standard ST monitor port and toggle between them using that switch. This would eliminate the need for a switchbox, so I at first stowed my Monitor Master in the closet. I later realized that while this works, when the RGB monitor is plugged into the Genlock output jack, the brightness of the output is lower that usual, and the intensity of the colors is not as bright. This is noticeable on my old 1985 SC1224 made by Panasonic for Atari, this particular run of monitors can produce a much brighter screen than all later models, and is considered by most ST enthusiasts to be the best RGB Atari ever sold, and would be even more evident on the dimmer screens of later SC1224s.
While this was fine when using the Genlock, I didn't like it for my other work, so I dragged out my Monitor Master again, hooked both monitors back to it, and plugged it into the Genlock's standard monitor out jack. I plug it into the other port only when I want to use the Genlock features. What we need is a switchbox which let's you select between two monitors and two different monitor ports! Interestingly, if you have a color/mono switchbox hooked up with a Genlock, toggling the switch on the switchbox itself will just cause the screen to go bananas, not reboot and switch resolutions. To switch monitors in this fashion you have to toggle the switches on both the switchbox and the Genlock!
The uses for a device like this are so numerous as to defy listing, covering applications from tinkering to professional output. You could make a cartoon character interact with real actors, superimpose titles over video, or even just get silly and doodle over your least favorite TV show.
If you are interested in the JRI Genlock, you can get more information by contacting them at JRI, P.O. Box 5277, Pittsburg, CA 94565; 415-458-9577. It's best to call before 1p.m. PST.
The sum off its parts
Any one of the products or techniques described above can be useful in jazzing up the graphics on your ST. Using two or more of them in combination can yield even more impressive results. The ST's graphics may not be able to compete head-to-head with those of a graphics workstation, but as you can see, the ST is not lacking in useful and powerful tools. Take those tools, add a little talent and imagination, and you may find that the combination will produce results you hadn't thought possible on an ST.
Blissfully ignorant of the realities of time and space and plain old common sense, Maurice Molyneaux hopes someone will someday discover "retroactive reincarnation" so that when he dies he can come back in a previous life as animation director Chuck Jones. His greatest fear would be to come back as Wile E. Coyote, and in the process have to learn some humility.