 |
ON DISK
MAKE IT MOVE 2.0
Easy Scripted Animation From MichTron
PROGRAMS BY RENE DE LA BRIANDAIS - ARTICLE BY ANDREW REESE, START GRAPHICS EDITOR
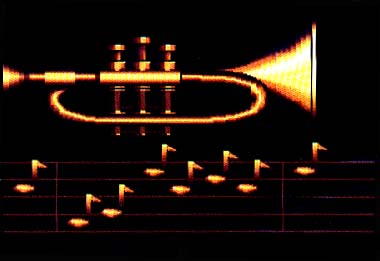
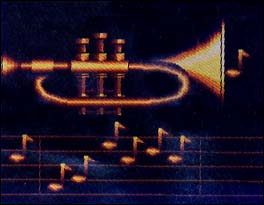
Everyone loves good graphics. If you've ever wanted to create wonderful animations easily, here's your chance. START is proud to present Make It Move 2. 0. With this set of three animation programs you can create complete animations, from a few DEGAS or NEOchrome images, filled with transitions and color effects - great for desktop video productions.
| AT A GLANCE | ||
|
||
| AT A GLANCE | ||
|
||
Make It Move is quite easy to use, once you understand how the animation method and the programs fit together. Read this article thoroughly before attempting to create your own animations. Several tutorials are also included on your START disk; they will not only take you through parts of the programs, but will also let you see how the effects were achieved.
Getting Started
To find the three Make It Move programs, double-click on the archive file MAKEMOV1.PRG and choose Extract when the dialog box appears. Select a destination disk and the files will un-ARC directly onto that disk. Make sure that OBJECTS.PRG, SCRIPT.PRG and VIEWIT.PRG are in the same folder.
To use the tutorial files, double-click on the second archive file, MAKEMOV2.PRG, and follow the steps outlined above. You may put these files in the same path as the programs, provided you have enough disk space. Make sure the files CURSOR.CPR, FILEBOX.CPR, MAINMENU.CPR, MENU.CPR, MESS1.CPR, MESS2N.CPR, MESS3N.CPR, SELECTOR.CPR, STARTUP2.CPR, STARTUPN.CPR, TITLE.CPR, TRUMP2.CPR, LESSON2.SCR and LESSON3.SCR are in the same folder.
Quick Start
To view the tutorials right away, double-click on VIEWIT.PRG from the Desktop. VIEWIT.PRG is a viewer program that you can distribute freely with your animations, as long as you don't remove any of the opening copyright notice screen. You may skip over the opening message (once you have read it) by clicking either mouse button once. When the file selector box appears, it will display only files in the path with .SCR (script) filename extenders. If necessary, change the path to that in which you un-ARCed the tutorial files and click on one of the tutorial script files, LESSON2.SCR or LESSON3.SCR. After a few moments of loading files, the tutorial will begin to run.
 |
If you want to stop the tutorial (or any other animation being shown with VIEWIT.PRG) or change to another lesson, simply right-click. If you want to quit Viewit, once you've halted an animation, simply click on the Cancel button in the file selector.
You can also view the tutorials using the Script program, SCRIPT.PRG. If you have a 520ST, however, you will need to get rid of any accessories or AUTO folder programs, including the program that boots your hard drive (if any) to have enough memory.
Defining Your Animation Objects
The first step in using Make It Move is to create your images in DEGAS Elite, NEOchrome, Cyber Paint or any other paint program you have. (Editor's note: You can also use SEURAT from the March 1989 issue of START.) Make It Move is not a paint program; you cannot create artwork with it.
Now, unless you're Super Animator, you should sit down and plot out each step in your animation with a storyboard, a shorthand graphic outline. With your storyboard in hand, you can then think about what your backgrounds should look like, the nature of your foreground objects and whatever special effects you're going to want.
Another thing you'll need to think about is the color palettes of your images. Make It Move will always use the background color palette to display the background as well as any foreground objects. In the absence of a background, the foreground object's color palette is used. If you want to mix and match pieces of your animation easily, use a single palette for all of your images.
If you want an object to zoom in or out, make sure it's on its own screen in the largest size you want it to be. Also, all objects should be surrounded by the background color (the key color or color 0) for the results. Finally, Make It Move will only load NEO and un-compressed DEGAS files (.P I1). If you are using a program that saves images in compressed DEGAS Elite format, turn compression off before saving.
Now run OBJECTS.PRG. This program module lets you define portions of a DEGAS or NEOchrome image as cels to animate. You can load two different screens into separate buffers and cut and paste objects between them. Your first choice, however, is between the FILE and PROCESS menus, and QUIT. Unless, you're already tired of animation (!), click on FILE, then READ and then select your file type. (CMPRSD is Make It Move's own compressed file format that includes object definition information along with image data.) You can also use the Objects program as a simple way to swap formats, since you can load an image in one format and save it in another.
Click on PROCESS and then DEFINE. Click at the upper-left corner of an object and then again at the lower right. A box appears for you to give it an eight-character name; this is only a definition, not the image filename. You may continue in this manner until you have defined all the objects you want to move or show. If you want to define two different objects with one object completely within the other, always define the smaller first.
You can also load a screen with a single object on it and convert it into a zoom object. After loading the screen, choose PROCESS, MORE, ZOOM, and whether you want the zoom to occur in one or both dimensions. Make It Move begins the process. You can let the program zoom the object down to nothing or stop it at any point. Once you stop the process, you can save it. If you don't like what you see, try again.
Other options are available from the SELECT branch. First, you must select an object by clicking within its borders. Then you can COPY it to another location on the image, SWAP its definition to the other screen or RENAME it. (Try to keep your object names meaningful; it'll help later on.)
To SWITCH between your two screens (and, to load a second screen initially), click on FILE, MORE, then SWITCH. You may also DROP a screen from memory using the FILE, MORE, DROP sequence.
Once you've defined all your objects and zooms, save your images as compressed program files, using the FILE, WRITE, CMPRSD sequence. Assign a filename of up to eight letters (Make It Move automatically adds its own. CPR extender.) Then select QUIT.
On to the Show
Defining your objects is just the beginning. SCRIPT.PRG lets you take your previously defined cels and images and combine them with zooms, moves, color effects and transitions.
It's a bit finicky about what accessories are installed. (For example, MichTron's own juggler II doesn't run from within SCRIPT.PRG.) If you have trouble, try eliminating your accessories and AUTO folder programs.
Double-click on SCRIPT.PRG from your Desktop to get the control screen. The SCRIPT area is at the top and three options, LOAD, CHANGE and QUIT, are in the MENU area at the bottom. At the very bottom of the screen, the available memory for Make It Move is displayed, along with two words in yellow. The left word always represents the activity of the left mouse button; the right word represents the activity of the right mouse button. At this point, you can either load one of the tutorial scripts from your START disk or create a new script using your previously defined objects.
Once you load a script (or a portion of one), a row of icons appear in the SCRIPT area. Each icon represents one of the events in your animation. If all the events do not fit on one screen, a small yellow arrow appears in the right margin, indicating there are more. To scroll through your script, click on the up or down yellow arrow. The small number above the upper-left-most icon is its number in the script, beginning with event number one.
Script Functions
The Script program uses a set of nested menus to call functions. Here is a brief description of them.
2 FADE: Fades one image to black, and then fades back from black to the second image.
ACCEPT: Saves color changes in the current palette.
BLACK: Fades one image to black.
BLUE D: Reduces the blue component of any selected color.
BLUE U: Increases the blue component of any selected color.
CHANGE: Changes an existing script.
CHOOSE: Changes an existing color.
CLEAR: Removes all images and scripts from memory.
COLOR: Changes one or more of palette colors (in as little as 1/60th of a second). This change does not affect images in memory.
CONT: Calls a script for viewing from the first full screen event preceding the current event (indicated by the yellow box).
CURRNT: Designates a script point as the first or last event in a partial script save.
CUT: Creates a transition from one image and palette to another.
DELAY: Adds a specific timed delay in a script.
DELETE: Deletes the current event.
DISOLV: Breaks up one image through a confetti-like dissolve to fade into another. You can control the size of the confetti to control the speed of the dissolve.
END: Selects the last event in the script as the final event in a script save.
FADE U: Creates a transition from one image to another by rapidly fading up on the second image.
FREE: Releases memory used by an image. (Don't use this option if you are going to need to use an object from that image later on in the animation; the program won't be able to find it.)
FRONT: Places one object in front of others.
GREEN D: Reduces the green component of any selected color.
GREEN U: Increases the green component of any selected color.
HIDE: Removes any object from the screen.
LOAD: Loads a script. The process runs through the entire script and performs all of the image READs. You may interrupt this performance by right-clicking, but if there are any unperformed READs, the program will not be able to find related objects.
MARK: Creates a place-holder in the script. A MARK does not affect the animation.
MODIFY: Changes features, such as speed or location, of existing events.
MORE: Reveals subsequent menus.
MOVIE: Moves an object anywhere on screen (after the speed in pixels per step is defined). Left-click to see the MOVE; right-click to accept it.
NOTE: Adds scratchpad notes (up to six lines of nine letters each) in a script.
OBJECT: Adds an event that affects an object, such as a SHOW, MOVE, FRONT or HIDE. Select OBJECT after choosing modify to change the object.
PLACE: Changes the location where objects appear and disappear.
QUIT: Exits the program.
READ: READs in an image file.
RECALL: Acts like an Undo for the last DELETEd event. A RECALLed event will be inserted in the script immediately before the current event.
RED D: Reduces the red component of any selected color.
RED U: Increases the red component of any selected color.
REPEAT: Loops the end of a script to the beginning for a continuous run.
RUN: Lets you view an animation from the beginning.
SAVE: SAVEs all or a portion of a script to disk. After entering a script filename, select the first event in the script to save by either choosing START, or clicking on a specific event. Then click on CURRNT. Select the final event by choosing either END or VIEW to see the events. Click on CURRNT again.
SCAN: Runs a script at high speed from beginning to end.
SCREEN: Displays a full-screen image. Left-click through the available images and right-click to select the one you want to view.
SHOW: Displays objects on the screen. Left-click inside an object's defining rectangle to select it; left-click outside the rectangle to cycle on to the next image. To select a zoom object, right-click on it.
SKIP: Hops through the script from one MARK to another.
SPEED: Sets the speed of any event, except a zoom, in pixels per step.
SPIRAL: Creates a transition from one image to another in a rectangular digital spiral.
SQUARI: Creates a transition from one image to another, with the second image fading in from the outside edge.
SQUARO: Creates a transition from one image to another, with the second image spreading out from the center.
START: See SAVE.
STEP: Marches through an animation one event at a time.
TIME: Changes the time associated with certain events.
VIEW: Previews an animation from the first full-screen event to the end of the script.
VSTRIP: Creates a vertical venetian blind transition from one image to another.
WAIT: Requires an event to wait for a left-click; a right-click stops the animation.
WHITE: Fades from one image to white.
WIPE D: Creates a transition from one image by lowering the second image from the top of the screen to the bottom.
WIPE L: Creates a transition from one image by spreading the second image across the screen from right to left.
WIPE R: Creates a transition from one image by spreading the second image across the screen from left to right.
WIPE U: Creates a transition from one image by raising the second image from the bottom of the screen to the top.
ZOOM: In order to add a ZOOM event to your script, you must first READ a ZOOM file, then select ZOOM. If you already have ZOOMed or SHOWN a ZOOM object, you can ZOOM it off; otherwise, you can only ZOOM it onto the screen. Click on ON. Here you'll be asked to set the duration of the event (the time before the next event takes place). Then, you'll cycle through each previously READ ZOOM file: left-click to go to the next file or right-click to choose one.
The next step is to set the starting point of the ZOOM; move the cursor to the point where you want the ZOOM to begin and left-click. To set the end-point of the ZOOM, move the cursor (and the "attached" ZOOM object) to the point where you want the ZOOM to stop. Left-click again to see the actual zoom. If you like it, right-click; if not, left-click to start over.
Conclusion
We hope you enjoy Make It Move. We're glad to be able to bring it to you in START.
Andrew Reese was formerly Editor of START and is now START's Graphics Editor and publications manager at a San Francisco Bay Area graphics software company.