T-SHIRT CONSTRUCTION SET
Microscreen iron-ons via Atari
by Charles Jackson, Antic Program Editor
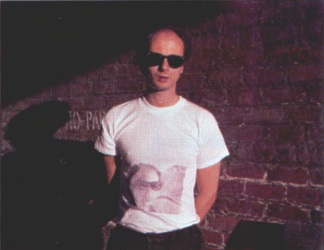
Customize T-shirts with your Atari – using your favorite microscreens created with touch tablet or MicroPainter. This short BASIC program works on Atari 8-bit computers with 32K memory and disk. However see article for special hardware requirements.
When you want customized T-shirts, you can visit places like Disneyland, 42nd Street or Fisherman's Wharf and search for the ultimate iron-on transfer.
Or, you can sit back and create your own with your Atari.
The T-Shirt Construction Set converts your favorite KoalaPad, MicroPainter or ComputerEyes microscreens into picture files which you can print out and iron onto your T-shirt.
T-shirt iron-ons are always mirror images of the picture you'll finally get, so you'll have to flip your picture before you print it. The T-Shirt Construction Set is a short BASIC program that loads your favorite microscreen and flips it into a mirror image of the original. The program saves this mirror image as a 62-sector picture file. Now you boot your favorite print utility and print the picture.
TRANSFER RIBBONS
You'll also need a heat transfer ribbon for your printer. These ribbons use a waxy ink designed to melt off your paper onto your T-shirt, leaving a permanent design.
Heat transfer ribbons are made for most dot-matrix printers – including Epson, Gemini, Star, Okidata, C. Itob, Prowriter NEC etc., and are available in many colors. You can buy these ribbons at many computer stores, or you can order them from the manufacturers listed at the end of this article.
Some manufacturers also sell heat transfer pens which you can use for adding more colors to your iron-ons.
Just color the paper transfer before you iron it onto your T-shirt.
THE PROGRAM
Type in Listing 1, SOFTWEAR.BAS, check it with TYPO II and SAVE a copy to disk before you RUN it. If you have problems with some of the tougher lines (75, 80, 110, 120 and 5070-5130), don't bother to type them in. Listing 2 will create them for you. When RUN, Listing 2 creates a file called LINES.LST which contains those special lines. Type NEW and then LOAD Listing 1. Next ENTER "D:LINES.LST" and SAVE the completed program.
The program can manipulate picture files created in either Graphics Mode 7 (ANTIC mode E) or Graphics Mode 8 (ANTIC mode F). When RUN, the program will ask you to select the graphics mode in which your microscreen was drawn.
Microscreens created with MicroPainter, Micro Illustrator (on KoalaPad, Atari Touch Tablet, etc.) and Computereyes (Low Contrast and High Contrast modes) use Graphics Mode 7. Microscreens created with Graphic Master and Computereyes (4-level, 8-level and Normal Capture modes) use Graphics Mode 8.
If you're still not sure which mode to use, try both and use the image which looks best. You can also use Rapid Graphics Converter from the November, 1985 Antic to transfer your pictures into a compatible format.
Once the program has created and saved a mirror image of your microscreen, you're ready to turn it into an iron-on transfer. Load your printer with heat transfer ribbon and boot your favorite printer utility. (Jerry Allen's Kwik Dump program from the March, 1985 Antic, will produce acceptable results on most printers.)
Be sure to print your picture on plain, white computer paper.
IRONING-ON
Ironing on your completed picture can be safe and easy when you observe a few simple guidelines.
Most heat-transfer ribbons work best with T-shirts containing at least 25% polyester. 100% cotton T-shirts do not work well because the ink will wash out.
Set your iron to its lowest temperature and let it warm up. Next, select a suitable T-shirt and spread it out on an ironing board or similar surface. Place a piece of aluminum foil inside the shirt to prevent the ink from bleeding through.
Position the iron-on transfer on your T-shirt (inked side down) and pin it in place. Press your heated iron on one section of the transfer and wait a few seconds. Next, lift the iron from the paper and press it against another section of your transfer. Try not to move the iron when it is pressed against the paper.
Since there are so many varieties of irons, printers and ribbons, you should experiment with different materials and heat settings to find the combination that works best for you.
MAIL-ORDER HEAT TRANSFER RIBBONS
American Ink Products
527 Howard Street
San Francisco, CA 94105
(415) 982-0161.

Ribbon Land
RO. Box 8634
Red Bank, NJ 07701
(201) 842-1437

Diversions, Inc.
1550 Winding Way
Belmont, CA 94002
(415) 591-0660
Listing 1: SOFTWEAR.BAS Download