New Owners Column
PROGRAM BY CHARLES JACKSON
Lesson 12: Graphics Modes
This series teaches beginners how to program in BASIC on all Atari 8-bit computers such as the 800XL and 130XE. The lessons began in the march, 1986 issue.
Computer graphics are great fun, and also an area where your Atari is really outstanding -- even in comparison to more expensive machines. In this lesson, we will introduce the Atari's graphics modes, an essential subject for understanding how to create colorful visual displays.
Your Atari can display visual information onscreen in various different modes (ways). You get at least 12 different ways to show information in a simple GRAPHICS command, such as:
10 GRAPHICS X(where X is any whole number between 0 and 11)
MEET THE MODES
Graphics Mode 0 (GR. 0) is the familiar blue screen seen when you turn on the computer. It displays 24 lines of 40 characters each. Two colors are normally displayed, the background color and the text color.
Graphics 1 (GR. 1) displays 24 lines of 20 characters that are twice as wide as those in GR. 0. This mode displays only capital letters, but it can display them in four different colors. Including the background color, you can normally put five colors on the screen at once in GR. 1. For a sample of text in GRAPHICS 1, type:
10 GRAPHICS 1:POSITION 1,1: PRINT #6; "HeLlO AnD wElCoMe"
Type GRAPHICS 0 and press [RETURN] to get back to the regular screen.
Graphics 2 is similar to GR. 1, but with 12 lines of 20 characters. Thus characters in GR. 2 are both twice as high and twice as wide as those in Graphics mode 0. This mode is also capable of five colors. Try this:
10 GRAPHICS 2:POSITION 0,1:PRTNT #6;"WeLcOme To #11"
TEXT MODES
Graphics Modes 0, 1 and 2 are the text modes, where information is put on the screen as text. In Graphics Modes 3 through 11, information is entered as colored dots. The difference between these modes is the number of colors available and the resolution--how many dots will fit on the screen.
In general, as the graphics mode number increases, the resolution and/or number of available colors also increases. However the memory requirement also increases. This table gives the requirements of the various GRAPHICS modes:
      GR.     No. of        Resolution         Memory
    Modes     colors         (width x          (Bytes)
     Text                      height)
       0         2            40 x 24           992
       1         5            20 x 24(-4)       672
       2         5            20 x 12(-2)       420
Graphics
       3         4            40 x 24(-4)       432
       4         2            80 x 48(-8)       696
       5         4            80 x 48(-8)       1176
       6         2           160 x 96(-16)      2184
       7         4           160 x 96(-16)      8138
       8         2           320 x 192(-31)     8138
       9         16           80 x 192          8138
      10         9            80 x 192          8138
      11         16           80 x 192          8138
You can see the tradeoffs among resolution, number of colors and memory requirements. For example, GR. 4 has the same resolution as GR. 5 but needs only half the memory and can produce only half the colors. Modes 9 and 11 can produce 16 colors at once, yet they need the same amount of memory as GR. 8, which has only two colors. The trade-off is resolution mode 8 can display 320 tiny dots across the screen, whereas GR. 9, 10 and 11 can only display 80 larger dots.
Graphics Modes 3, 5 and 7 each are capable of four colors--one background color and three "dot" colors. GR. 4 and 6 are capable of only two colors: the background color and one dot color.
In GR. 8, although two colors are possible, you have much less control over what they are. The dot color is the same as the background color, but with a different luminance (brightness). For example, if the background is black, the dot color could then be anything from white through shades of gray to black. Of course, if you make the dot color black, you'd be unable to see the dots against the black background.
Graphics 0 shares this limitation regarding to color selection. GR. 9 and 11 can display 16 colors at once, but again there are certain constraints on the colors you can select. GR. 3 lets you choose one color, and the others will be 16 shades of the color selected. GR. II lets you choose one luminance and can display all 16 colors in that selected shade. Finally, GR.10 allows nine colors, which can be anything you like.
VARIATIONS
When you ran the examples for GR. I and 2, you noticed that the top part of the screen was black, while the last few lines (equal to four lines of GR. 0 text) were still blue. This arrangement, with a large graphics section at the top of the screen and a small "text window" at the bottom is typical for GR. 1-8. To get rid of the text window and have an all-graphics screen, add 16 to the number you call in the GRAPHICS command. GRAPHICS 7+16 or GRAPHICS 23 produces GR. 7 with no text window:
10 GRAPHICS (7+16)
The screen heights listed in the table above are for the "no text window" case. If you want a text window, the available height of the screen is reduced by the number in parentheses. For example, in GR. 7 a text window reduces the available height of the screen from 96 to 80.
You'll also notice that the screen is cleared when you use the GRAPHICS command. Normally this is what you want. I don't think I've ever used the GRAPHICS command without wanting the screen cleared. But if you ever want the data left on the screen, just add 32 to the number in the GRAPHICS command. The following line delivers GR. 1 without the screen clear. GRAPHICS 33 also works:
10 GRAPHICS (1+ 32)
You may add both 16 and 32, so that you have no text window and the screen is not cleared. As long as there is a text window, the word READY will appear at the bottom of the window when a program finishes running. An advantage to this is that you can look at whatever you have put in the upper part of the screen for as long as you like. If you do a GRAPHICS command without the text window, the screen automatically returns to the blue GR. 0 screen when the program is completed. To prevent this, you can add a line such as:
20 GOTO 20:REM endless loop, press [BREAK] to end the program and return to GR. 0.
 SCREEN POSITION
Since the text Graphics modes and the graphics Graphics modes are quite different, we will look at them separately. First we'll cover the text modes.
Below, the PRINT #6; tells the Atari to put the text in the upper (normally black) part of the screen. If you just use PRINT, the text will be displayed in the text window. Try this:
10 GRAPHICS 1:PRINT #6;"THIS IS THE GRAPHICS PART";
20 PRINT "THIS IS THE TEXT WINDOW";
To specify where in the upperpart of the screen you want the text, use the POSITION statement in the form: POSTTION X-coordinate, Y-coordinate. Because computers count funny, the upper left corner of the screen is 0,0- not 1,1. So if the resolution of GR. 1 is given as 40 x 24, you can use any number between 0 and 39 for the X-coordinate and any number between 0 and 23 for the Y-coordinate. Going outside these ranges generates, naturally, a "cursor out of range" error.
The POSITION statement will not work to specify the position of the text in the text window. Instead you must POKE the X-coordinate into memory location 657 and the Y-coordinate into 656. The Y-coordinate is measured from the top of the text window, so the range of values for the Y-coordinate is 0 to 3:
10 GRAPHICS 1:POKE 657,3:POKE 656,1: PRINT "MOVE OVER IN THE TEXT WINDOW"
FOUR-COLOR TEXT
Getting four colors for letters is easy, if not straightforward. Normally, only capital letters will print on the screen. If you use a PRINT #6 statement containing capitalized characters, they will appear in one color. Lower-case letters will appear in upper case, but in a different color. Two more colors can be obtained by using inverse-capital letters and inverse lower case letters:
10 GRAPHICS 1
20 PRINT "THE FIRST COLOR";
30 PRINT "the second color"
40 PRINT "THE THIRD COLOR":REM in inverse
50 PRINT "the fourth color":REM in inverse
You can get lower-case letters and certain symbols in GR. 1 and 2 by POKEing 756,226, which gives you four colors of the lower-case letters, but you can't have both capital letter and lower-case letters on the screen at the same time.
What about numbers and other characters? You can print an inverse number, but there's no such thing as a lower-case number. To get the other two colors for numbers, you need to print out different characters altogether. Like lower-case letters, certain characters don't appear on the GR.1 and 2 screens the way you'd expect them to appear. A full reference table showing these character substitutions would be too large to print here. In many cases, however, you can determine the proper ASCII value to use by taking the ASCII value of your original character and subtracting 32 (for color register 1), adding 36 (for color register 3) or adding 128 (for color register 2). Next month's New Owners Column will explain the Atari color commands in detail.
THE LISTING
This month's listing, by Antic Technical Editor Charles Jackson, is a flashy visual demonstration showing what all the different Atari graphics modes look like. Type in Listing 1, NEWOWN12.BAS, check it with TYPO II and SAVE a copy to disk before you RUN it.
When RUN, the program begins its tour through the graphics modes with a simple Graphics 1 text screen. Press any key when you want to move along to a Graphics 2 text screen. Notice the flashing text window at the bottom of the screen.
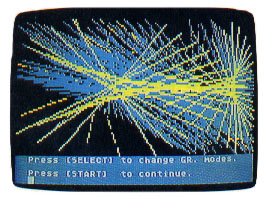
Now you can press any key to switch over to the ''dot" or "bit-mapped" graphics modes. Here, the program plots the course of a bouncing, rotating line. After each bouncing line is drawn, you may press the [START] key to draw another bouncing line, or press the [SELECT] key to move to the next grraphics mode.
While the line is being plotted, the text window displays the number of the graphics mode you`re seeing, the number of available columns and rows, the number of available colors and the number of the color currently being used. Since most of these demo screens include a text window, the number of available rows is decreased. Graphics 9, 10 and 11 do not allow text windows, so you'll need to remember to press the [START] or [SELECT] keys after each "bounce." I've included a short beeping sound to let you know when a drawing is complete.
PROGRAM TAKE-APART
Line 35: Defines four color values for graphics mode 10. Graphics 10 allows nine different colors, but only five of them may be defined with the SETCOLOR statement! (which you'll learn about in the next lesson). The four remaining color values must be POKEd into memory.
Lines 70-90: These lines alternate the colors on our Graphics screen, giving the effect of motion. This technique is often called "color rotation." Since we don't want to rotate our colors too fast, we slow down the process with a statement such as X= SIN(4). This statement uses your Atari's trigonometric functions, which take a (rela- tively) long time to compute.
Lines 120-140: This routine displays and removes the flashing text window in the Graphics 2 demo.
Lines 150-230: These lines tell the computer which graphics mode you want to use, along with the screen width, screen height and the number of available colors.
Lines 800-920: This is the subroutine which draws the bouncing line. Actually, the routine randomly creates two sine waves, one point at a time. Each time a pair of points is plotted, the program draws a line between them. The effect is a bouncing, rotating line capable of creating colorful patterns.
Listing: NEWOWN12.BAS Download