Tapeless Spreadsheet Printer
Sideways printouts made easy
by Robert Grunbok
 A commercial program that prints IBM spreadsheets sideways in a continuous strip is a big seller. Now you can type in an 8-bit Atari program that does the same thing for SynCalc, VisiCalc and SpeedCalc spreadsheets. Tapeless Spreadsheet Printer is a BASIC program that works on 8-bit Atari computers with a minimum of 48K memory and a disk drive.
I use my Atari 130XE and Broderbund's SynCalc Spreadsheet for both home and business budgets. I had to convince a board of directors that the Atari could do the job of the "big business" computers, but now that I've crossed that bridge, each board member seems to need his or her own copy of the budget.
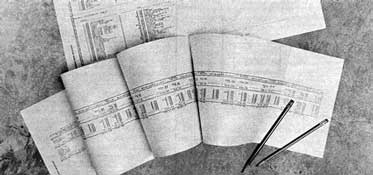
Connecting spreadsheet printouts with transparent tape soon became boring, especially after hearing "Let's change this figure to that amount" a few times. Tapeless, my sideways spreadsheet printer for the 8-bit Atari, was born out of the tedium of taping page after page of spreadsheets. This published version works with SynCalc, VisiCalc and SpeedCalc spreadsheets.
Tapeless supports four major printer families—the Epson FX-80, Gemini l0X, Star SG-10 and Okidata 92. One of these drivers should work for most printers on the market today.
TYPING IT IN
To minimize typing and enable you to use maximum-size strings, your version of Tapeless will be constructed from several smaller files. This isn't as complex as it sounds. Just check the listings that apply to your printer and follow the instructions below.Don't renumber the listings: I deliberately have some lines overlaying others during "construction" for your printer.
Follow these steps using TYPO II to check your work, and SAVE or LIST to disk as instructed:
1. Type in Listing 1, TAPELESS.BAS, and SAVE it to disk.
2. Type in Listing 2, MAKEAUTO.BAS, and SAVE it to disk. This creates an AUTORUN.SYS file needed to RUN other files.
3. Type in Listing 3, TITLE.BAS and SAVE it to disk.
4. Choose the file containing character set data for your printer—either TOPDOT1.LST for Okidata/Gemini l0X printers, or BOTMDOT1.LST for Epson FX-80/Star SG-l0 printers. Type it in and LIST it to disk.
5. Choose the character loader file for your printer. (For example, if you own an Okidata printer you would choose OKILOAD.LST) Type it in and LIST it to disk.
6. Type NEW.
7. To construct your actual printer character loader, type LOAD "D:TITLE.BAS", then ENTER the files from your disk in this order:
- a. One character set data file (TOPDOT1.LST or BOTMDOTl .LST)
- b. One character loader file (FX80LOAD.LST, G10XLOAD.LST, SG10LOAD.LST or OKILOAD.LST)
For example, if you own an Okidata 92 printer, type LOAD "D:TITLE.BAS". Then ENTER "D:TOPDOT1.LST" and then ENTER "D:OKILOAD.LST".
8. SAVE this constructed program as PRNTLOAD.BAS.
9. RUN MAKEAUTO.BAS. This creates an AUTORUN.SYS file for PRNTLOAD.BAS.
10. You have now constructed the three major files composing the Tapeless program—AUTORUN.SYS, PRNTLOAD.BAS and TAPELESS.BAS. Transfer them to a freshly formatted disk (containing DOS 2.0 or 2.5) and retain the other files on your "construction disk" both for backup and for making different versions of Tapeless for different printers.
11. Don't be tempted to combine PRNTLOAD.BAS and TAPELESS.BAS into one file. Chaining these programs allows the simulated string array, "P$" in TAPELESS.BAS, to be as large as possible.
PRINTING
If your form has more than 80 horizontal rows, you'll have to tape a horizontal joint. However, most spreadsheet memory restrictions don't allow a very tall and wide form.To speed up the program, the screen is blank most of the time while Tapeless RUNs. However, you'll still hear the beeps of the disk being read to let you know that Tapeless is working. If you have BASIC XL or BASIC XE ($79, OSS), the program will run even faster. Just don't forget to copy the BASIC XE Extensions file to your Tapeless disk.)
If your form is exceptionally large or your Atari's memory is less than 48K, Tapeless will do multiple loads and prints until the entire form is finished. So always be sure to load your printer with plenty of paper.
IMPORTANT: If the program instructs you to check a DIP switch, make sure you've turned off the printer power before setting switches. Otherwise, you could blow an integrated circuit in your printer.
PROGRAM OPERATIONS
1. While in your spreadsheet program, turn off window and title options and remove any printer commands (such as condensed print).2. PRINT your file to disk—don't SAVE it.
3. If the form is taller than 80 rows, you will need to print your form to disk in horizontal sections (80 rows high times the width of your form). Those with wide carriage printers can change the 80 in lines 90, 220, and 520 of TAPELESS.BAS to allow for the number of columns your printer can accommodate at 10 characters per inch).
4. Turn off the computer and insert your Tapeless disk. Turn on the computer and follow the instructions on the screen.
SYNCALC TO DISK
1. Press [OPTION].2. Choose LOAD/SAVE.
3. Choose SAVE.
4. Choose TEXT.
5. Set RANGE by cell numbers. Remember: 80 rows maximum per horizontal section to print out.
6. Enter filename. (SynCalc adds a .TXT extender automatically)
7. Press [RETURN].
8. Load the Tapeless disk and follow the instructions onscreen.
VISICALC TO DISK
1. Position the cursor at cell A1.2. Press [/] to get the command menu.
3. Press [P] for Print.
4. Press [F] for File.
5. Input D:FILENAME.TXT
6. Press [RETURN].
7. Specify the lower right cell (Remember: 80 rows maximum per horizontal section to print out.) and press [RETURN].
8. Load the Tapeless disk and follow the instructions on the screen.
SPEEDCALC TO DISK
1. Position the cursor on the lower-right cell to be printed.2. Press [CONTROL] [P] to print.
3. Enter D:FILENAME
4. Now move the cursor to the upper-left cell to be printed. (Remember: 80 rows maximum per horizontal section to print out) Press [RETURN].
5. Load the Tapeless disk and follow the instructions on the screen.
Bob Grunbok is a water treatment plant operator from Newhall, California. He has been programming Atari computers since 1981.
Listing 1 TAPELESS.BAS Download
Listing 2 MAKEAUTO.BAS Download
Listing 3 TITLE.BAS Download
Listing 4 TOPDOT1.LST Download / View
Listing 5 BOTMDOT1.LST Download / View
Listing 6 FX80LOAD.LST Download / View
Listing 7 G10XLOAD.LST Download / View
Listing 8 OKILOAD.LST Download / View
Listing 9 SG10LOAD.LST Download / View