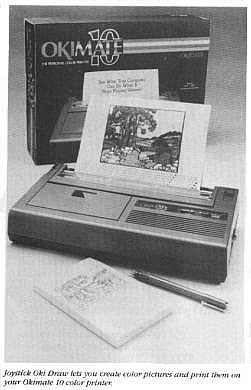
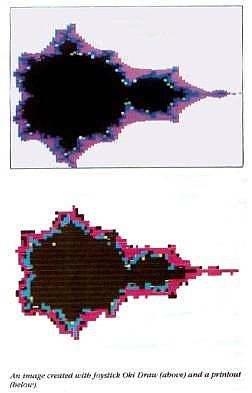
Joystick Oki Draw
From Screen To Okimate 10, In Nine Colors
By Denis Schaffer
Joystick Oki Draw is a simple, effective nine-color drawing program that makes printouts on the inexpensive Okimate 10 color printer. This BASIC program works on all 8-bit Atari computers of any memory size. Saving your pictures requires a disk drive.
Use Joystick Oki Draw to paint color pictures on your 8-bit Atari computer screen. And then effortlessly print them out on Okidata's affordable Okimate 10 color printer. You can choose from nine colors – red, orange, yellow, green, blue, purple, white, black and grey.
You also have the choice of two drawing modes. Mode 1 gives you the equivalent of a Graphics 5 screen – 80 columns x 48 rows. Mode 1 is especially good for small children because it is easier to use, and the screen dumps are a full page wide.
Mode 2 gives you the total Graphics 0 screen – 80 columns X 192 rows. Mode 2 is better for creating fairly detailed drawings and is also more useful if you want to make a number of identical pictures for invitations or announcments, etc. That's because can print two identical pictures side-by-side, without using any additional time or color ribbon.
To print mode 2 pictures side-by-side, in program line 40 change SIDE=0 to SIDE=1.
GETTING STARTED
Type in Listing 1, COLOR.BAS, check it with TYPO II and SAVE a copy before you RUN it. When Joystick Oki Draw starts, you'll see a each mode 2 picture occupies slightly less than half the page width. So with a slight program modification, you brief set of instructions and then you will be prompted to choose mode 1 or mode 2.After you type a number, you will be prompted to type the filename for saving and/or loading a picture. If you just press the [RETURN] key the default name is DRAWFILE. After you type a ifiename, the screen will appear with the paint cursor flashing in the center. In the upper right corner, the white dot represents the size of the cursor.
Move the joystick in any direction to move the paint cursor. If you want to erase something, simply hold down the joystick button while moving the cursor over whatever you want to erase. To change to another color, press the [SPACEBAR] until the cursor is the color you want.
To clear the entire screen and start over again, press the [TAB] key twice. To move the cursor to a new postion without erasing or drawing over anything on the screen, press the [INVERSE VIDEO] key at the lower right corner of the keyboard. The cursor will stop flashing and can now be moved without affecting the current screen. After you reposition the cursor, press the [INVERSE VIDEO] key again and resume drawing.
SPECIAL FEATURES
If you want to slow down the cursor, press [<]. Pressing [SHIFT] [<] makes the cursor move at its slowest speed. If you want a faster cursor, press [>]. To make the cursor move at its fastest speed, press [SHIFT] [»].If you are in mode 2, you can change the size of the cursor. Pressing [+] increases the size of the cursor. Pressing [SHIFT] [+] increases the size of the cursor to its maximum. Pressing [-] decreases the cursor size and pressing [SHIFT [-] decreases the cursor to its smallest size.
To save a file to disk, press [S]. This will save the file under the name given when the program was first started. To load a file from disk, press [L]. This overwrites whatever is currently onscreen.
Finally, press [P] to print a hardcopy of the onscreen picture. The Okimate 10 color printer is the only printer that works with Joystick Oki Draw. Make sure that the Oki 10 is turned on and that there is a color ribbon in it.
PROGRAM TAKE-APART
Lines 50 to 290 contain the instructions to make the cursor move and draw. Line 280 checks to see if any keys have been pressed.Lines 300 to 370 set up the variables and screen.
Lines 380 to 470 are the Oki 10 screen dump for mode 1.
Lines 480 to 620 are the screen dump for mode 2.
Lines 630 to 790 check which key has been pressed and perform the appropriate instruction. If the instruction is to save or load from a disk or to perform a screen dump, the screen is turned off by POKEing a 0 into address 559. This causes the computer to work slightly faster. After the operation is finished, the screen is turned back on by POKEing the appropriate number into address 559.
Line 800 decreases the width of the cursor.
Line 820 increases the width of the cursor.
Line 840 changes the color of the cursor.
Lines 890 to 910 are used to clear the screen. Line 900 checks to see if the [TAB] key has been pressed a second time. Otherwise the command is ignored.
Lines 920 to 1060 print the instructions and get the mode number.
Lines 1070 to 1110 get the name of the file that is to be used by the program.
Lines 1120 to 1160 save a picture to disk.
Lines 1170 to 1230 load a picture from disk.
Denis Schaffer is a Civil Engineer who wrote this program while at MIT obtaining his M.S. graduate degree.
LISTING: COLOR.BAS Download